Heartfelt note to the document remediator
I see you, I've been you, and I'm begging you to save often. Save multiple versions of documents so you can revert changes. Adobe Acrobat has some serious bugs that we try to steer you away from in this guide, but the worst part is that the Undo function doesn't always work. You've been warned, good luck!
This guide is not in any particular order, and is intended to help you fix checks that you can't find solutions to on Adobe's help page.
Not sure where to start? Check out our guide on How to Remediate a complex PDF with Adobe Acrobat Pro for a start to finish guide.
Table of Contents
- Heartfelt note to the document remediator
- Adobe Acrobat Accessibility Checker
- Document
- Image-only PDF
- Tagged PDF
- Logical Reading Order (manual check)
- Primary Language
- Title
- Bookmarks
- Color contrast (manual check)
Adobe Acrobat Accessibility Checker
 Learn how to find and run Adobe Acrobat's Accessibility Checker on our help page:
PDF Remediation in Adobe Acrobat Pro
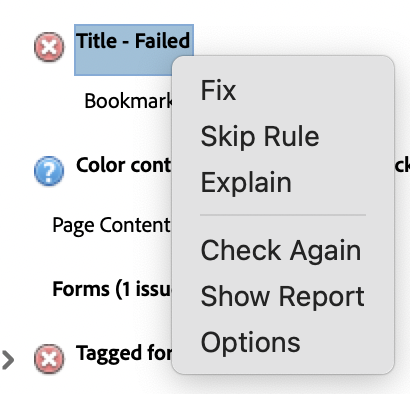
Unsure about failed checks in Adobe Acrobat's Accessibility checker? Check out their help page: Create and verify PDF accessibility (Acrobat Pro), or right click on the failed check and choose the "Explain" option to learn more about that specific issue.
The "Fix" option is only present on some checks. While it may look like a great single click solution, there are sometimes issues with this option. Even if this option is available, make sure you understand what is being fixed. If have any issues, consult the guide below for more information on the specific issue that needs to be fixed.
The "Check Again" option only re-checks one issue, rather than running the full accessibility check again. This option is great to see if a change you made had the intended affect.
Document
Image-only PDF
If you're dealing with an image-only PDF, you probably don't have access to a viable source document to fix the issue there. For this reason, we recommend using Adobe Acrobat's optical character recognition (OCR) tool to identify text within the image.
- Go to All Tools > Scan & OCR > In this file > check All Pages > Recognize text
This can also be fixed using the "Fix" option from the issue context menu.
If you go to All Tools > Edit a PDF, Adobe Acrobat may automatically convert any recognized text into editable text. However, in doing so this, you may end up changing the font of some of that text, throwing off the visual style of the document. To avoid this, always run the "Scan & OCR" tool before "Edit a PDF".
Tagged PDF
This means your document doesn't have any accessibility tags at all. Run the autotagger to get started fixing this issue:
- Go to All Tools > Prepare for accessibility > Automatically tag PDF
This fix will create tags, but they may not all be perfect. Always check the Logical Reading order manually after using the autotagger.
Right click the failed check, and choose "Check Again" from the context menu. The check should now show as passed.
You can try using the "Fix" option from the context menu, but we've experienced issues with this option in the past, specifically that the visual style of the document is altered by this action. If this happens, you may need to close without saving to revert to a previous version, or remediate the visual style of the document.
Logical Reading Order (manual check)
Adobe Acrobat's accessibility checker reminds you to manually check the reading order of your document's tag tree every time it is run. Though it doesn't present an error, it does present a warning as a reminder to perform this vital check manually. To perform this check,
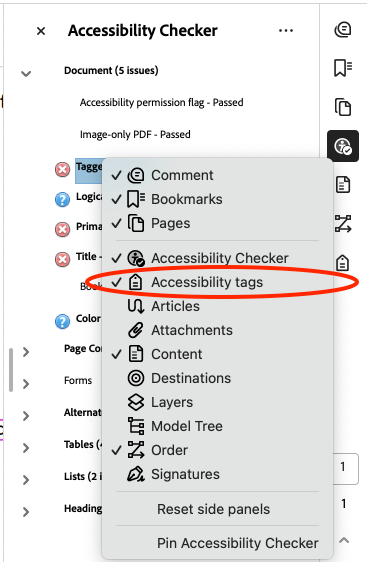
- Open the Accessibility tags sidebar. The icon for this sidebar looks like a luggage tag. If you don't have this sidebar
option, right click your sidebar and make sure it is checked in the context menu (see
image).
- The tag tree should consist of a Tags root, containing a <Document>, which should
contain all other tags in the PDF.
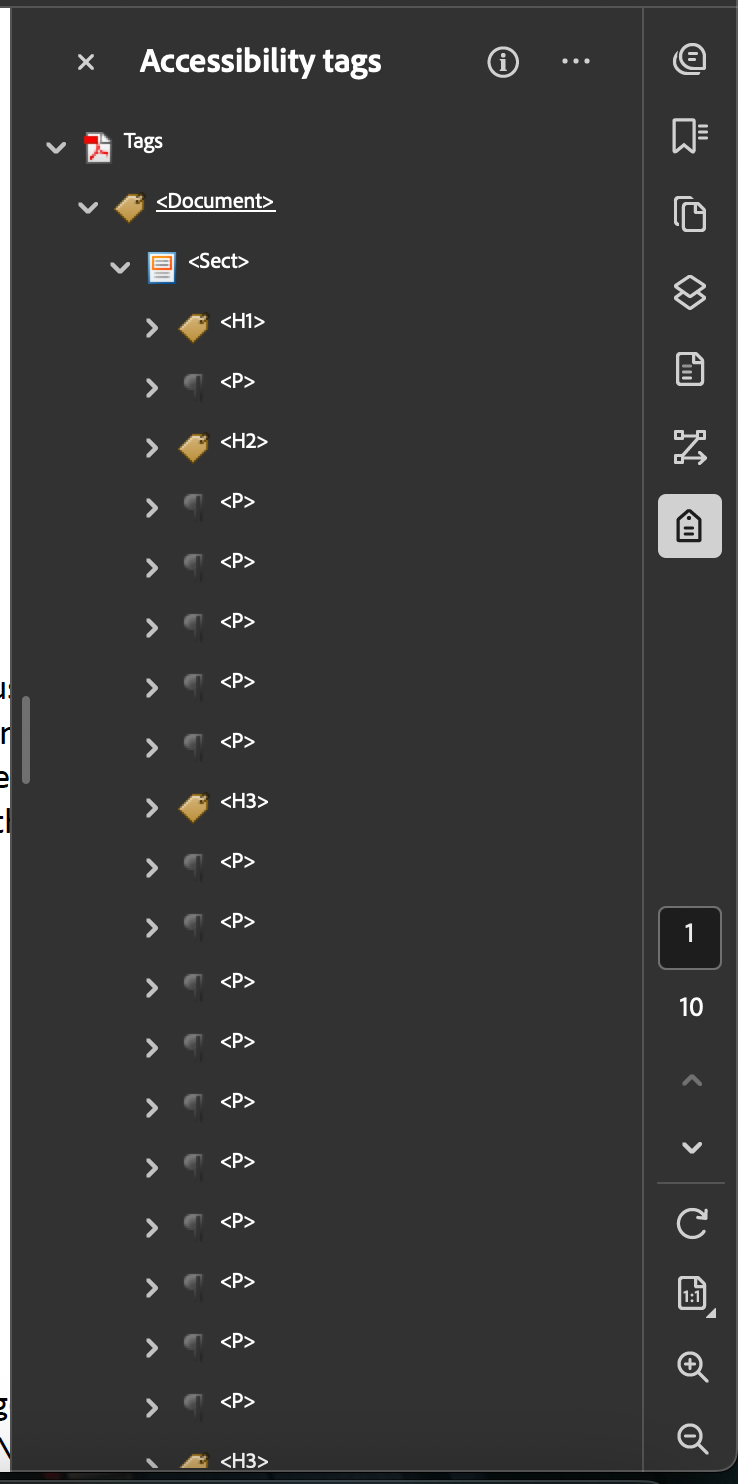 Note: The caret next to each tag opens it. If there is no caret, it is empty.
 - Start at the top tag and use your keyboard's down arrow to highlight each tag in sequence.
Each element should be highlighted in your document in the appropriate order. It is
wise to open container tags like lists <L> and tables <Table> to ensure the contained
items are in the correct order as well.
This phase of checking the document is also a great time to review your headings. - If everything is in the correct order, your check is complete. If not, you can drag and drop tags into the correct location, or tag any untagged content.
Your document should now be much more accessible to screen readers.
Primary Language
This issue is safe to use the "Fix" context menu option on. To double check that the document language is correct,
- Right click anywhere on the document and go to Document properties in the context
menu,
OR
Go to Menu > File > Document properties - Go to the Advanced tab and update the language in the Reading Options section.
- Right click on the failed check and choose "Check Again" from the context menu. The check should now show as passed.
Title
- Right click anywhere on the document and go to Document properties in the context
menu,
OR
Go to Menu > File > Document properties - Update the Title field to something readable by humans (not a filename with dashes and underscores between the words).
- Right click on the failed check and choose "Check Again" from the context menu. The check should now show as passed.
The title is important for the visual presentation of your document as well, it appears in the top of almost every PDF viewer (example image, Google Chrome):

You can try using the "Fix" option from the context menu, but we've experienced issues with this option in the past, specifically the title field is filled with the file name, so its best to review this manually.
Bookmarks
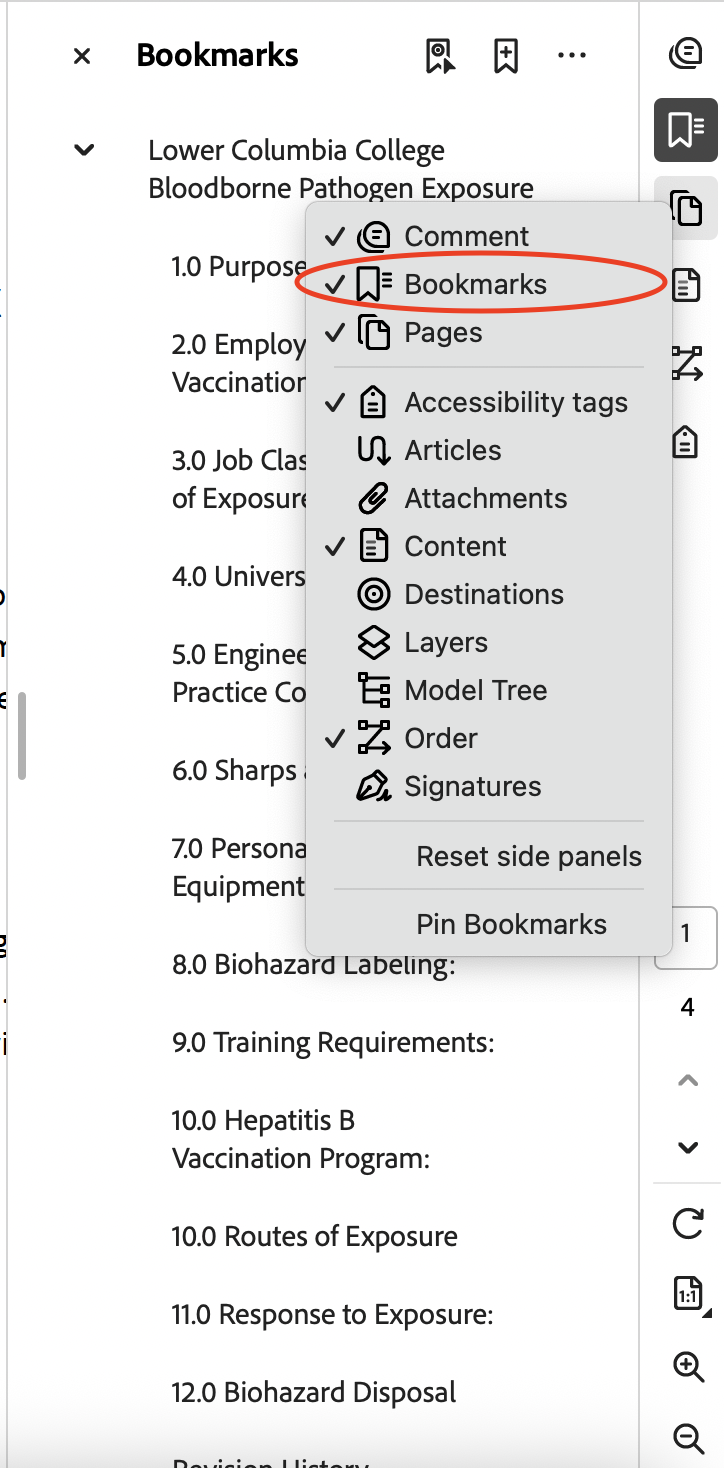
Bookmarks function a lot like a table of contents, and are required for longer documents to make sure they are easily navigable. They can be found and edited in the Bookmarks sidebar in Adobe Acrobat.
If your document fails this check, it has no bookmarks. You can use the "Fix" option to generate bookmarks for your document based on its heading structure. If you haven't already, make sure your heading structure is correct before running this fix.
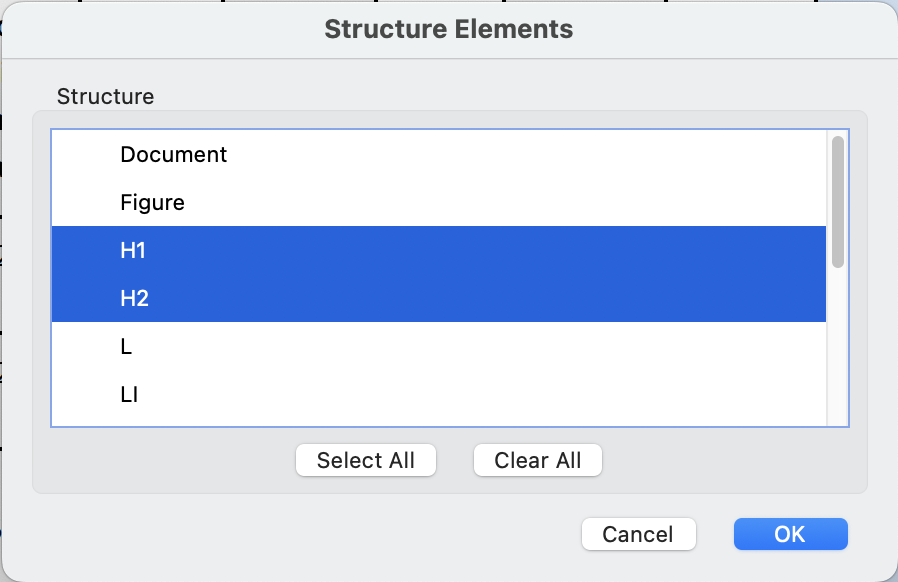
Generally, we recommend selecting all headings levels available in the "Structure Elements" dialog as shown in the image below.
Right click on the failed check and choose "Check Again" from the context menu. The check should now show as passed.
Color contrast (manual check)
Color contrast is not checked by Adobe Acrobat's Accessibility Checker, so it must be done manually. If you converted this document from a Microsoft Word document, and previously ran the Microsoft Word Accessibility Assistant, you have already checked the color contrast, and you can mark this test as passed.
Important note: No checker we have found verifies accessible contrast in embedded images, so confirm the contrast is accessible with the creator of the image, or manually verify using an eyedropper tool and a hex contrast checker.
Page Content
Tagged content
If your source document is a Google Doc, you may see this error because of a known issue downloading Google Docs as PDFs, which fails to tag header/footer content as artifacts. To fix this, download the Google Doc as a Microsoft Word document (.docx) and import that document into Adobe Acrobat Pro (see Converting a Word Document to PDF for more information).
For all other untagged content, follow the instructions below to fix the issue:
- Open the Accessibility Tags sidebar.
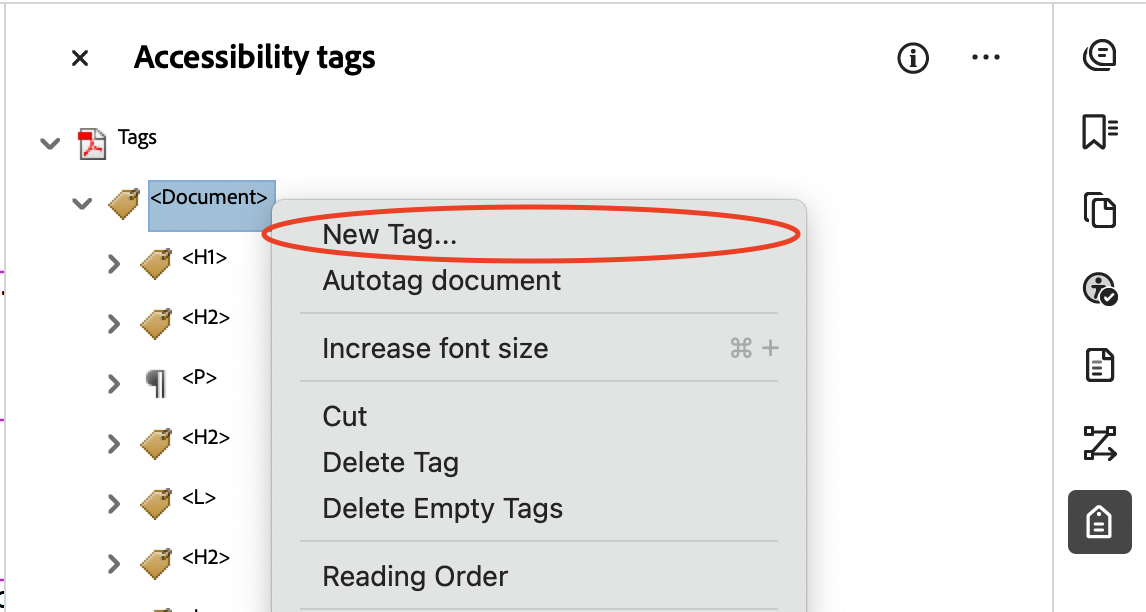
- Right click on the <Document> root tag and choose "New Tag" from the context menu.
- If there is no document root tag, come back to this after reviewing the tag tree (see Logical Reading Order).
- Create a new tag with any type. I like to make it recognizable, using all caps for
the tag type (e.g. "TEMPORARY"). You can also add a title to further distinguish this
tag. Close the <Document> root tag and the <TEMPORARY> tag will be under it.

Note: This tag is temporary container for all our untagged content, and will be deleted when we are done with it. - Right click the temporary tag and choose "Find..." from the context menu.
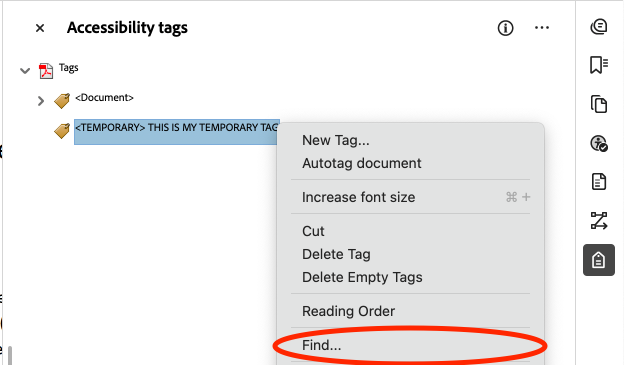
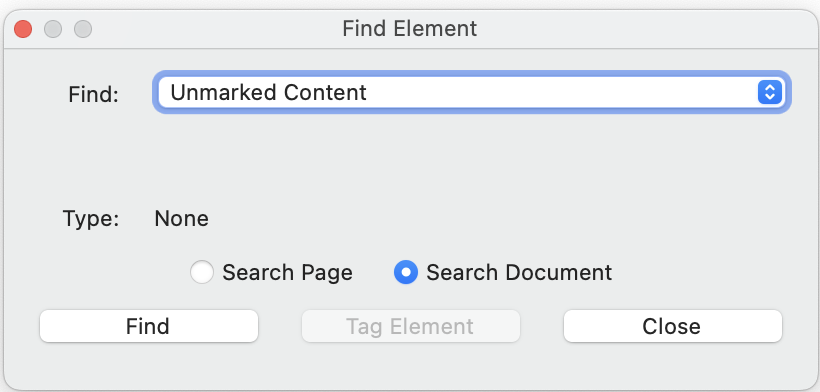
Note: It is important that you have the temporary tag selected when you choose "Find" from the context menu, so that all found content will go inside the temporary tag. Otherwise, the found content may be place somewhere unexpected. - In the dialog that pops up, choose "Unmarked Content", and "Search Document" options.
Then click the "Find" button.
- Click the "Tag Element" button continuously for each new element found until you see
a popup that says "Find Completed". Click OK.

- The temporary tag you created in step 3 should now contain all previously untagged
content. You can organize any important tags as you see fit. Unimportant tags, including
page numbers, and other header/footer information, as well as stray "Path" tags can
be changed to artifacts. Select all the ones you want to artifact, right click, and
choose "Change Tag to Artifact..." from the context menu.

- Right click on the failed check in the Accessibility Checker sidebar and choose "Check Again" from the context menu. The check should now show as passed. If it doesn't, there should at least be fewer elements in the error list. Repeat steps 4-8 until there are none and the check shows as passed.
- Delete the temporary tag you created in step 3.
Your document should now pass the "Tagged content" accessibility check.
Tagged annotations
Annotations can include a few types of elements:
- Links to external resources or to different sections of the same document
- References to footnotes or citations
- Fillable form fields
- Form fields are sensitive, so even small changes to a form field will require retagging of that field. To avoid more work, ensure form fields are named appropriately and that you have prepared the form apporpriately before tagging them.
Regardless of the type of annotation, the steps to tag them are the same:
- Open the Accessibility Tags sidebar.
- Right click on the <Document> root tag and choose "New Tag" from the context menu.
- If there is no document root tag, come back to this after reviewing the tag tree (see Logical Reading Order).
- Create a new tag with any type. I like to make it recognizable, using all caps for
the tag type (e.g. "TEMPORARY"). You can also add a title to further distinguish this
tag. Close the <Document> root tag and the <TEMPORARY> tag will be under it.
Note: This tag is temporary container for all our untagged content, and will be deleted when we are done with it. - Right click the temporary tag and choose "Find..." from the context menu.
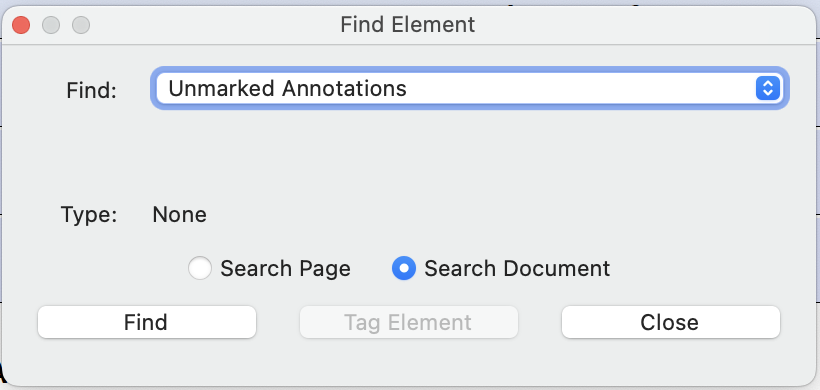
Note: It is important that you have the temporary tag selected when you choose "Find" from the context menu, so that all found content will go inside the temporary tag. Otherwise, the found content may be place somewhere unexpected. - In the dialog that pops up, choose "Unmarked Annotations", and "Search Document" options.
Then click the "Find" button.
- Click the "Tag Element" button continuously for each new element found until you see
a popup that says "Find Completed". Click OK.
- The temporary tag you created in step 3 should now contain all previously untagged
annotations.
- Links to external resources or to different sections of the same document will display as "Link - OBJR" elements (OBJR stands for Object Reference). They should be wrapped in a <Link> tag, and moved into the correct reading order location in the tag tree (The <Link> tag should be a child of a paragraph tag <P>, and should also contain the link text).
- References, or links to a footnote/citation should also display as "Link - OBJR" elements. They should be treated the same as Links (above), with the additional step of wrapping the <Link> tag contained in a reference tag <Reference> before moving it into the correct reading order location in the tag tree. (The reference tag <Reference> should be a child of a paragraph tag <P> , and the footnote/citation itself should be wrapped in a note tag <Note> with an ID that the reference tag references). Learn more about tagging footnotes and citations in this short video.
- Fillable form fields should be wrapped in a <Form> tag and moved into the correct reading order location in the tag tree, in the same paragraph tag <P> as the form field's label.
- Right click on the failed check in the Accessibility Checker sidebar and choose "Check Again" from the context menu. The check should now show as passed. If it doesn't, there should at least be fewer elements in the error list. Repeat steps 4-8 until there are none and the check shows as passed.
- Delete the temporary tag you created in step 3.
Your document should now pass the "Tagged annotations" accessibility check.
Tab Order
This one is super easy. To fix the failed check:
- Right click the failed check in the Accessibility Checker sidebar to view the context menu.
- Choose "Fix" from the context menu.
Your document's tab order should now match the structure order of your document.
Navigation Links
Multiple links to the same location (external, or within the same document) should be minimized. If this flag check fails, you may consider updating your source document to use fewer duplicate links.
Forms
Tagged form fields
Tagging untagged form fields follows the same steps as tagging untagged annotations.
Field descriptions
If you've already followed the instructions in the Preparing a form section, this check should not fail. However, if you do this after tagging your form fields, you may need to retag any that you changed.
Alternate Text
Figures alternate text
To fix this issue immediately:
- Go to All Tools > Prepare for Accessibility > Add alternate text
- The first image in your document's reading order will be highlighted. In the Set Alternate Text dialog, describe this image so that a user not relying on sight can understand what it is meant to convey, or check the "Decorative figure" box if the image contains no information.
- Use the left and right arrow buttons to go to the next image (or the previous one) and repeat steps 2-3 until all images have alternate text.
- Click the "Save & Close" button in the Set Alternate Text dialog.
Nested alternate text
Elements that require alt text should not be nested within other elements that require alt text. Most of the time, these elements can be combined within a single tag like a figure tag <Figure>. Since this error can happen for a large number of reasons, there is no one-size-fits-all solution. However, hopefully the following tutorial can help you find a solution to the issue:
- Expand the failed rule, right click on one of the elements and choose "Show in Tags
Panel" from the context menu.
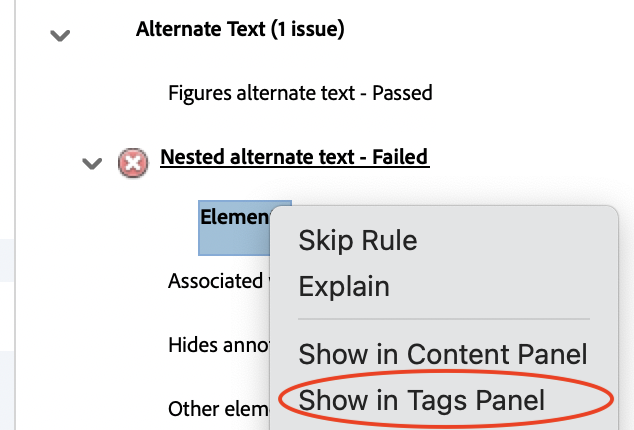
- The element causing the problem should now be highlighted in the tag tree in the Accessibility
tags sidebar. In this example, there is a figure tag <Figure> nested within another
figure tag.
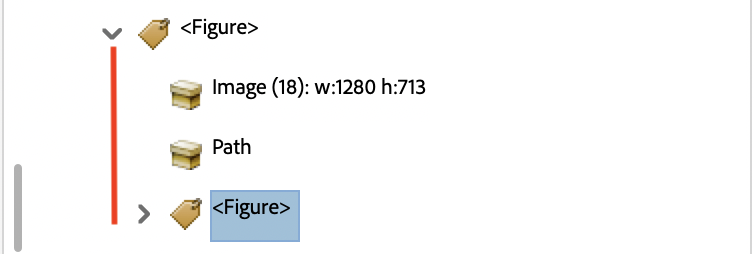 Depending on the situation, you have two options.
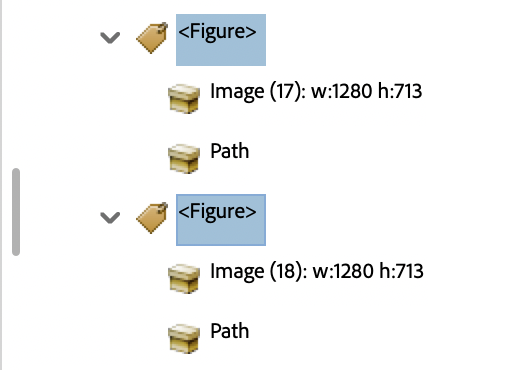
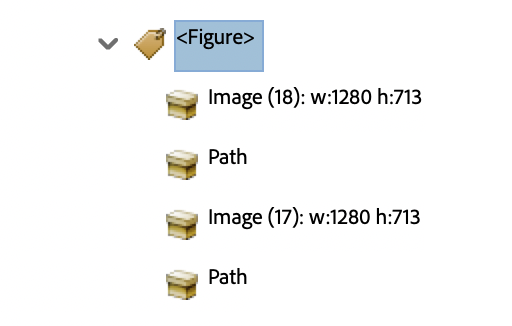
- If the parent figure and child figure are separate images, you should drag the child
figure tag <Figure> out of the parent figure tag. Here is what it looks like when
that has been corrected. You should now adjust the reading order as needed.
- If the parent figure and child figure are a part of the same image, you should open
the child figure tag <Figure> (using the caret next to it), and drag its content into
the parent tag, deleting the empty child figure tag.
- If the parent figure and child figure are separate images, you should drag the child
figure tag <Figure> out of the parent figure tag. Here is what it looks like when
that has been corrected. You should now adjust the reading order as needed.
- Repeat steps 1-2 for every element in the list of the failed check.
- Right click on the failed check in the Accessibility Checker sidebar and choose "Check Again" from the context menu. The check should now show as passed. If it doesn't, there should at least be fewer elements in the error list. Repeat steps 1-3 until there are none and the check shows as passed.
Your document should no longer contained nested elements with alt text.
Tables
Rows
If you're getting this issue, your document contains stray table rows without the proper parents.
- Expand the failed rule, right click on one of the elements and choose "Show in Tags Panel" from the context menu.
- The table row element <TR> causing the problem should now be highlighted in the tag tree in the Accessibility tags sidebar. Drag this tag into the appropriate table tag <Table>, and if that table has a head <THead> or a body <TBody>, drag the row into the appropriate container. If there is no table tag to put the row into, you may need to tag the table manually.
Your document should now contain appropriately nested table rows.
TH and TD
If you're getting this issue, your document contains stray table cells without the proper parents.
- Expand the failed rule, right click on one of the elements and choose "Show in Tags Panel" from the context menu.
- The table cell element causing the problem should now be highlighted in the tag tree in the Accessibility tags sidebar. It should be a <TH> (table header cell) or <TD> (table data cell). Drag this tag into the appropriate table row tag <TR>. This can be found by expanding the parent table tag <Table>, and if that table has a head <THead> or a body <TBody>, expand that as well. If there is no table, head, or body tag to put the cell into, you may need to tag the table manually.
Your document should now contain appropriately nested table cells.
Headers
If you're getting this issue, there are tables in your document without a header row. A header row is required for all tables in a document. To find the offending table(s):
- Expand the failed rule, right click on one of the elements and choose "Show in Tags Panel" from the context menu.
- The table cell element causing the problem should now be highlighted in the tag tree in the Accessibility tags sidebar.
It is usually best to fix this in the source document, specifically in Microsoft Word (because Google Docs does not have table header functionality). To do so:
- Open your source document in Microsoft Word.
- Click into the first row of a table without a header row.
- On the Table Design tab, check the "Header Row" box.

- Repeat steps 1-3 for each table in the document that doesn't have a header row, taking care to only check the box when your cursor is in the first row of a table, otherwise you will mark multiple rows as header rows, which is its own problem.
When you convert that Microsoft Word document to a PDF, that PDF should no longer fail the "Headers" accessibility check.
If you do not have access to the source document, you may need to fix this table manually.
Regularity
If you're getting this issue, there are tables in your document that are irregular, meaning merged or split cells are used. To be accessible, tables must contain the same number of columns in each row, and rows in each column. To find the offending table(s):
- Expand the failed rule, right click on one of the elements and choose "Show in Tags Panel" from the context menu.
- The table element causing the problem should now be highlighted in the tag tree in the Accessibility tags sidebar.
It is usually best to fix this in the source document, specifically in Microsoft Word. Most of the time this means rebuilding the table, or deleting and rebuilding rows that contain merged/split cells.
Lists
List items
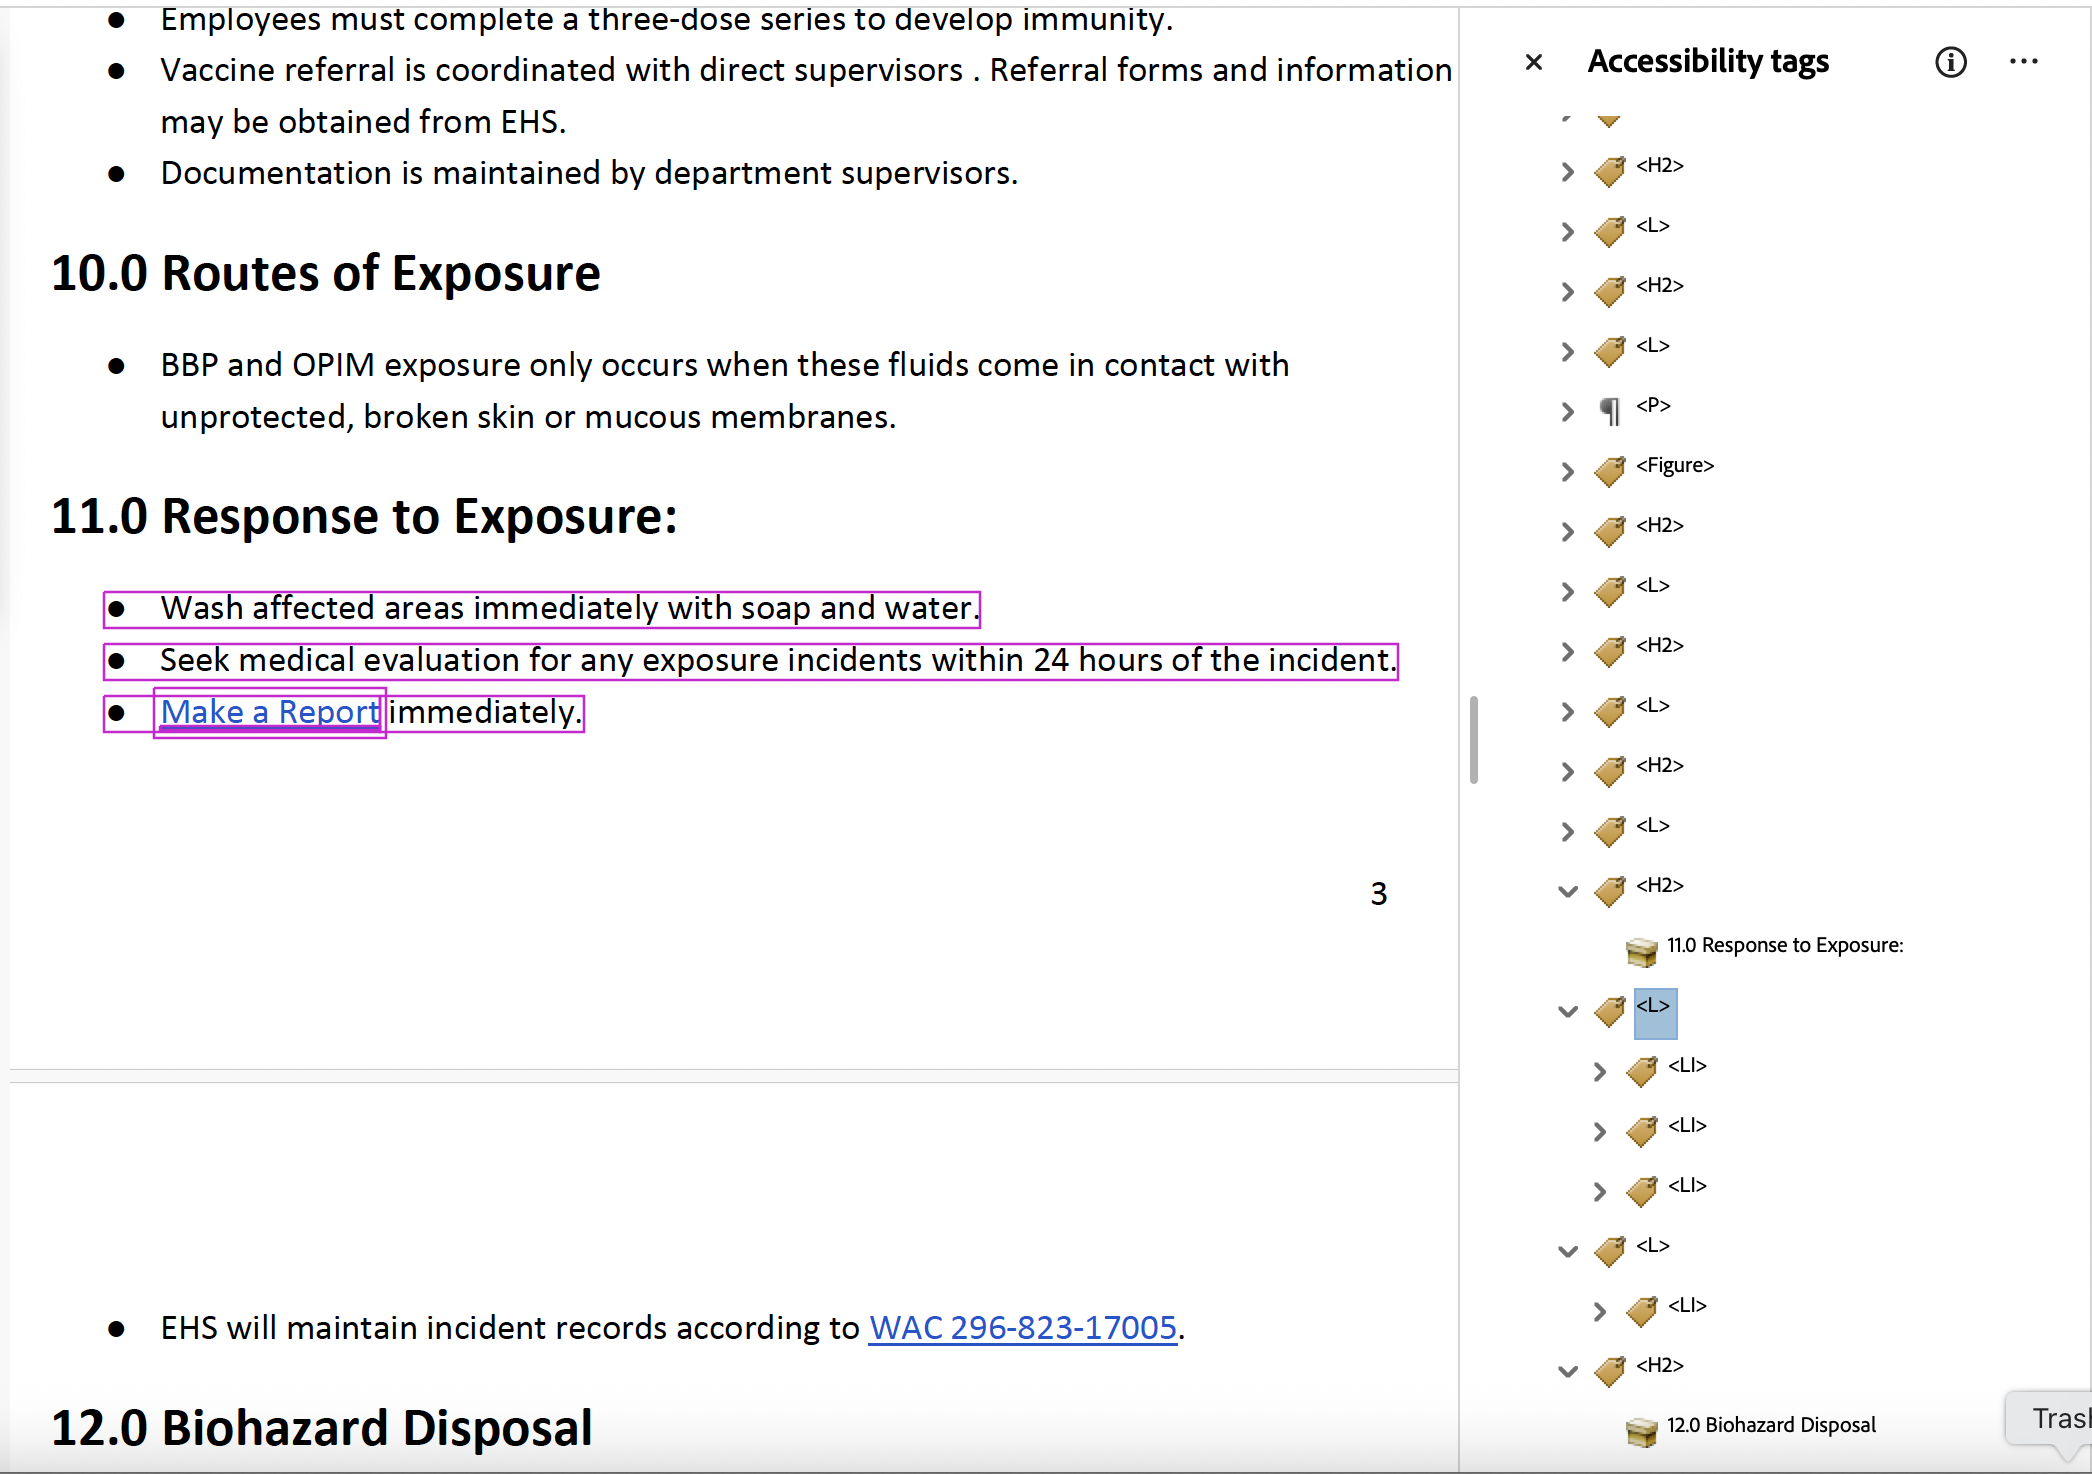
If you're getting this issue, the structure of one or more lists in your document is incorrect. Stray list item tags <LI> exist in the document that are not a part of a list tag <L>. To find the offending list item(s):
- Expand the failed rule, right click on one of the elements and choose "Show in Tags Panel" from the context menu.
- The list item element causing the problem should now be highlighted in the tag tree in the Accessibility tags sidebar.
- If there is an existing list tag <L> for the list that the item <LI> is a part of, drag the misplaced list item tag into the list tag so that the list item is a child of the list. If there is not, create a new list tag <L> by right clicking in the Accessibility Tags sidebar, selecting "New Tag" and selecting "List" from the Type dropdown (or type "L" into the text field).
- Right click on the failed check in the Accessibility Checker sidebar and choose "Check Again" from the context menu. The check should now show as passed. If it doesn't, there should at least be fewer elements in the error list. Repeat steps 1-3 until there are none and the check shows as passed.
Lbl and LBody
If you're getting this issue, the structure of one or more lists in your document is incorrect. Stray label tags <Lbl> or list item body tags <LBody> exist in the document that are not a part of a list item tag <LI>. To find the offending item(s):
- Expand the failed rule, right click on one of the elements and choose "Show in Tags Panel" from the context menu.
- The list item lable or body element causing the problem should now be highlighted in the tag tree in the Accessibility tags sidebar.
- If there is an existing list item tag <LI> for the list that the label <Lbl> or body <LBody> is a part of, drag the misplaced label or body tag into the list item tag so that the label or body is a child of the list item. If there is no list item tag <LI>, create a new one by right clicking in the Accessibility Tags sidebar, selecting "New Tag" and selecting "List item" from the Type dropdown (or type "LI" into the text field).
- Right click on the failed check in the Accessibility Checker sidebar and choose "Check Again" from the context menu. The check should now show as passed. If it doesn't, there should at least be fewer elements in the error list. Repeat steps 1-3 until there are none and the check shows as passed.
Headings
Appropriate nesting
If your document is failing this check, your headings likely skip a level, or you have accidentally marked text as a heading that should not be.
Headings should be used in hierarchical order to denote page structure. More information about how to use headings properly is available on our General Content Accessibility Guidelines help page. With that in mind, you should review your heading order while performing the manual check for logical reading order.
Not sure where to look?
- Expand the failed rule, right click on one of the elements and choose "Show in Tags Panel" from the context menu.
- The heading element causing the problem should now be highlighted in the tag tree in the Accessibility tags sidebar.
- Correct the issue in your source document, before converting back to a PDF.
- When you run the check again, that heading should no longer cause it to fail. If there are additional heading(s) that cause the check to fail, repeat steps 1-4 until your headings are ordered and nested appropriately.
Your document should no longer fail the Headings - Appropriate nesting accessibility check.
One last thing to check for, which will not be caught by Adobe Acrobat's Accessibility Checker, is headings with no body.
Not Checked By Adobe Acrobat
Adobe Acrobat's accessibility checker is great, but is incomplete. There are some checks that need to be done manually, that are often forgotten because Adobe's checker doesn't remind users to check them.
Empty table cells
Even if there is no data for a given cell, the text “No data”, “N/A”, or something similar should be placed in the cell to avoid confusion for users of assistive technology. A common mistake is to leave the top left cell of a table blank. To fix this, use this cell to label the first column. This should be fixed in the Microsoft Word version of the document before converting it to a PDF.
Headings with no body
Headings require body content of some kind, because without it, the heading begins a section that immediately ends. This error in hierarchy can cause confusion. To fix:
- Find headings with no body while performing your manual check for "Logical Reading Order".
- Fix these in the source document by converting them to "Normal Text", or by adding body content under the heading, whichever works best for your document.
- If you do not have access to the source document, you can change the element type in Adobe Acrobat instead.
Heading Body definition: Every heading needs to have content that it is the heading of, this content is called its body. It can also be called paragraph text, child content, section content, etc. but it can contain headings and images as well, so these labels are incomplete. The heading body accounts for all content between the heading and the next heading of equal or lower number.
For example, an H2 maybe followed by a paragraph, an H3, an H4, a paragraph, and an H1. Everything between the H2 and H1 is part of the H2's body.
Improperly tagged table of contents
If your document contains a table of contents, but it is not tagged as a <TOC> in Adobe Acrobat's Accessibility tags sidebar, you should review your source document (Microsoft Word document or Google Doc) to ensure the table of contents tool is being used. If you don't have the source document, you can tag the table of contents from scratch.
List and TOC spanning multiple pages
If you have converted from a Microsoft Word document or Google Doc, often list tags <L> that span multiple pages, will be broken into multiple lists in the Accessibility tags tree, one on each page. The same issue arises with table of contents <TOC> tags that span multiple pages.
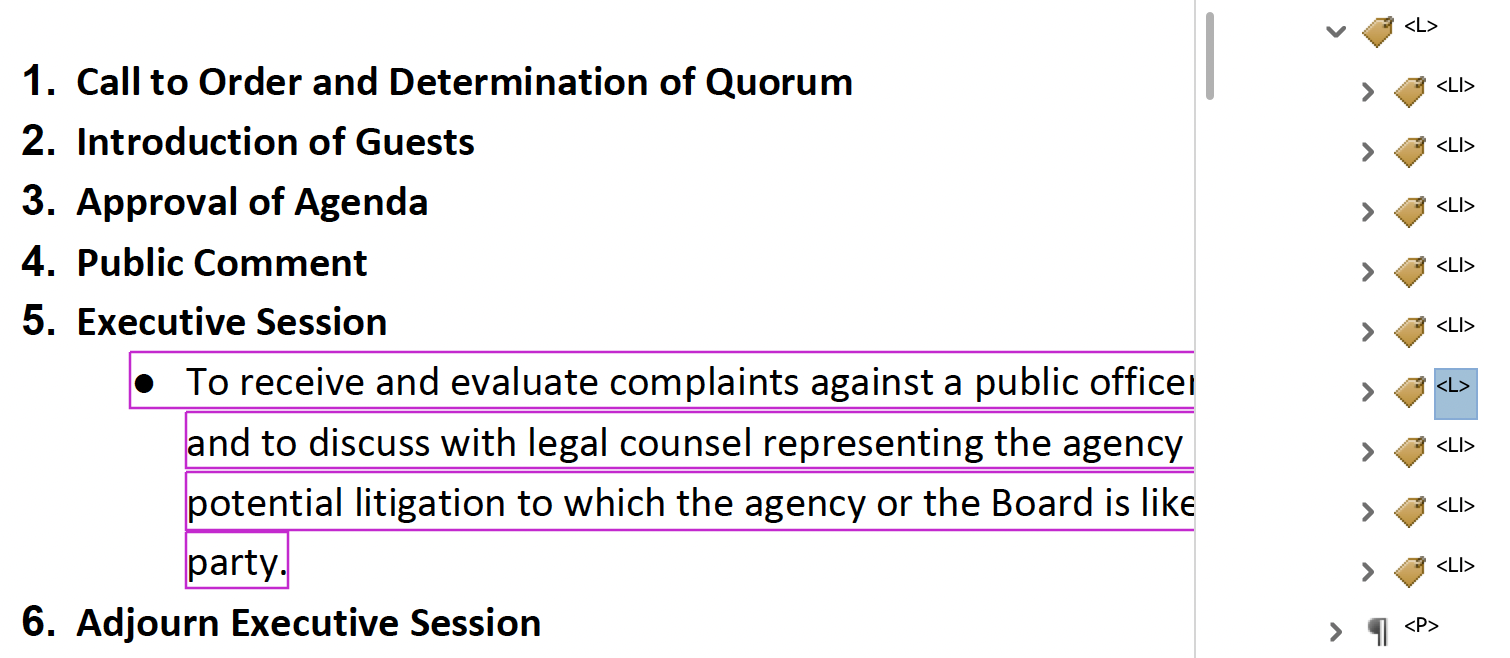
In the image below: the list items <LI> before the page break are tagged in a separate list <L> from the items after the page break.
To fix Lists or TOCs spanning multiple pages,
- Identify any lists or tables of contents that span multiple pages, and find their tags in the Accessibility tags sidebar.
- Open each list tag <L> or table of contents tag <TOC> (using the caret next to it).
- Select all the list items <LI> (or table of contents items <TOCI>) from the second list <L> (or table of contents <TOC>).
- Drag the selected items below the last list item <LI> (or table or contents item <TOCI>) in the first list <L> (or table of contents <TOC>), making sure to keep the items in order.
- Once you have emptied the second list <L> of all list items <LI> or table of contents <TOC> of all table of contents items <TOCI>, you can delete the empty tag.
- If the list or table of contents spans more than one page break, repeat steps 1-4 until there is only one list tag <L> or table of contents tag <TOC>.
- Do this for each list <L> or table of contents <TOC> in the document
Your list(s) or table(s) of contents should now be accessible to screen readers.
Malformed lists
List tags <L> should only contain list item tags <LI>. A list item tag <LI> should only contain an optional label tag <Lbl> and a required list item body tag <LBody>. If a label is used, it should be ordered before the list item body. Below is an example of a list with two items that is formed correctly:
<L>
<LI>
<Lbl>
<LBody>
<LI>
<Lbl>
<LBody>
Any deviation from this rigid structure is not allowed, meaning lists can be malformed in all sorts of ways. To ensure your document's accessibility, we recommend manually exapnding all list tags (using the caret next to it) as well as their children to make sure the structure is correct. This sounds tedious, but is usually very quick once you know what to look for.
You can usually count on Google Docs and Microsoft Word to format lists properly, but we do see these specific issues a lot in documents converted from those formats:
- Lists spanning multiple pages
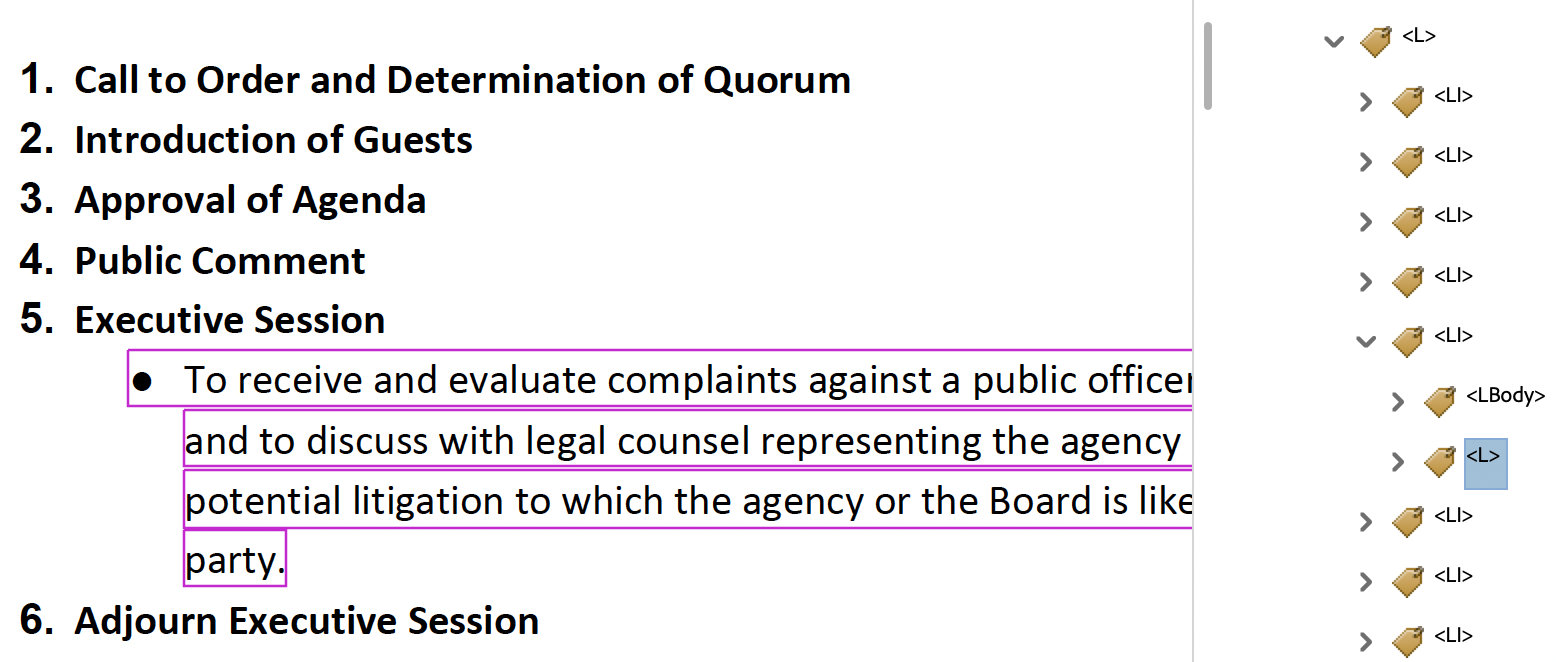
- Lists with sublists. Often, we see the list tag <L> of the sublist at the root of the main list <L>, or of the list item tag <LI>. This is incorrect, that list tag <L> should be dragged into the list item body tag <LBody> of the list item <LI> before it. Consider these two examples of incorrect nesting followed by an example of correct nesting:
Missing document root
Sometimes a document contains all the tags it needs, but no <Document> root tag. To fix this,
- Open the Accessibility Tags sidebar.
- Right click the Tags root and select "New Tag" from the context menu.
- Choose Document from the "Type" dropdown in the "New Tag" dialog. Click OK.
- Drag all the document's tags into the <Document> tag.
Your tag tree should now be more accessible.
If your document doesn't have any tags, follow the instructions in the Tagged PDF section instead.
Preparing a form
Adobe does a good job of detecting form fields in a document automatically. To prepare a fillable form in Adobe Acrobat:
- Open a PDF document in Adobe Acrobat. If you need to convert from a Microsoft Word document, do that first.
- Go to All Tools > Prepare a form.
- In the Prepare a form window, on the Select a file tab, check the box if the document requires signatures, and ensure that "Auto-detect form field is ON".
- Click the "Create a form" button.
- Fillable form fields should be created in any locations they were detected. Sometimes Adobe detects more form fields than there should be. Feel free to delete any form fields your form doesn't need.
- Right click on the first form field and choose "Properties" from the context menu
to open the Properties dialog.
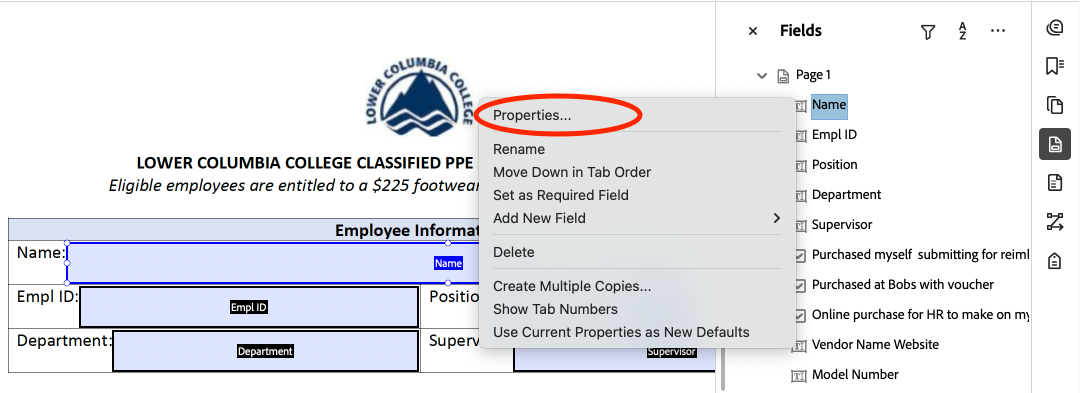
- In the Properties dialog for that field, in the General tab, you should ensure that both the Name and Tooltip are set to something human-readable and descriptive. In the image above, you can see that an abbrevation is used for the Emloyee ID field, "Empl ID". The Name and Tooltip should not be abbreviated, so "Employee ID" should be spelled out.
- You can close this window and reopen it for each field to verify that the name and tooltip are accessible. To save some time, you can also keep the Properties dialog open and click each field or use your arrow keys to change which field's properties are shown in the dialog.
- A common issue with the autodetect feature for form fields is that special characters get left out of the Name, but not the Tooltip (see image below), or that the Tooltip is left blank.
For most field types, you should set these fields to use the same content.
 Radio button groups are the exception to this rule: Name and Tooltip can't be set on the group, so instead set the Group Name. For each
choice in the group, you should set the Name and Tooltip to the same thing as the
group's Group Name. To change the text of each individual choice, click the choice
and then click it again to make its text editable (see image below).
Radio button groups are the exception to this rule: Name and Tooltip can't be set on the group, so instead set the Group Name. For each
choice in the group, you should set the Name and Tooltip to the same thing as the
group's Group Name. To change the text of each individual choice, click the choice
and then click it again to make its text editable (see image below).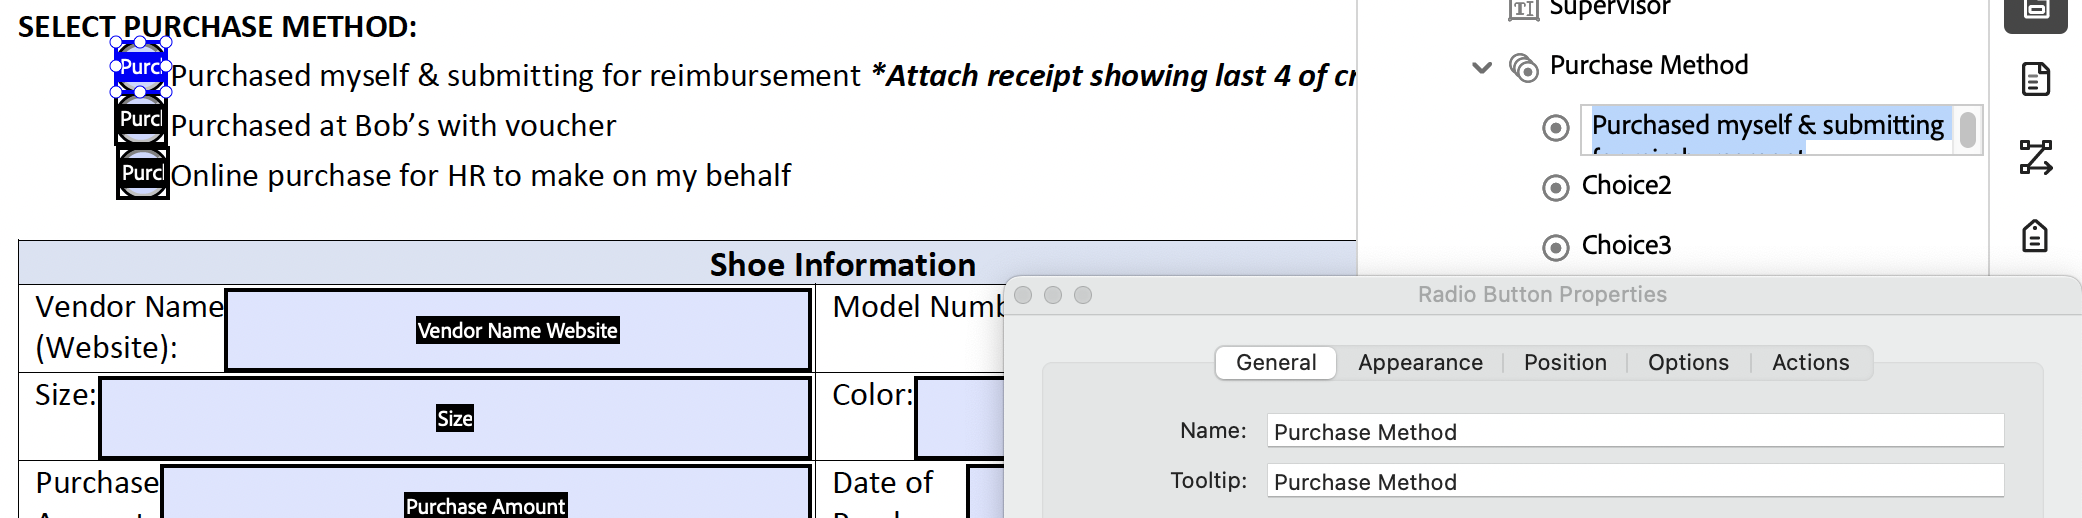
- Ensure duplicate fields are intentional. Often, forms will have multiple date fields.
- If each of these is meant to be filled by a different person, ensure that each are labelled uniquely, e.g. "Employee Signature Date", "Supervisor Signature Date", etc. instead of just "Date_1" and "Date_2". This practice should be adopted for any fields with titles that are similar, e.g. multiple "Total" fields should be adjusted to be more descriptive: "Total funds", and "Total points" should be distinguishable.
- If each field is meant to be filled by a single user, consider reducing redundant entry requirements. If this is not an option, make the title for each duplicated field exactly the same. Adobe will automatically add a suffix ("#0", "#1", "#2", etc.) to the end of each duplicate field, which will allow a user to only fill it once, but this only works if the titles are exactly the same.
- Make sure the form fields are in the correct order. If they are not, you can drag and drop the fields into the correct order in the Fields sidebar.
Your form is now prepared properly, but is probably not tagged properly. Learn how to fix this below in the following sections:
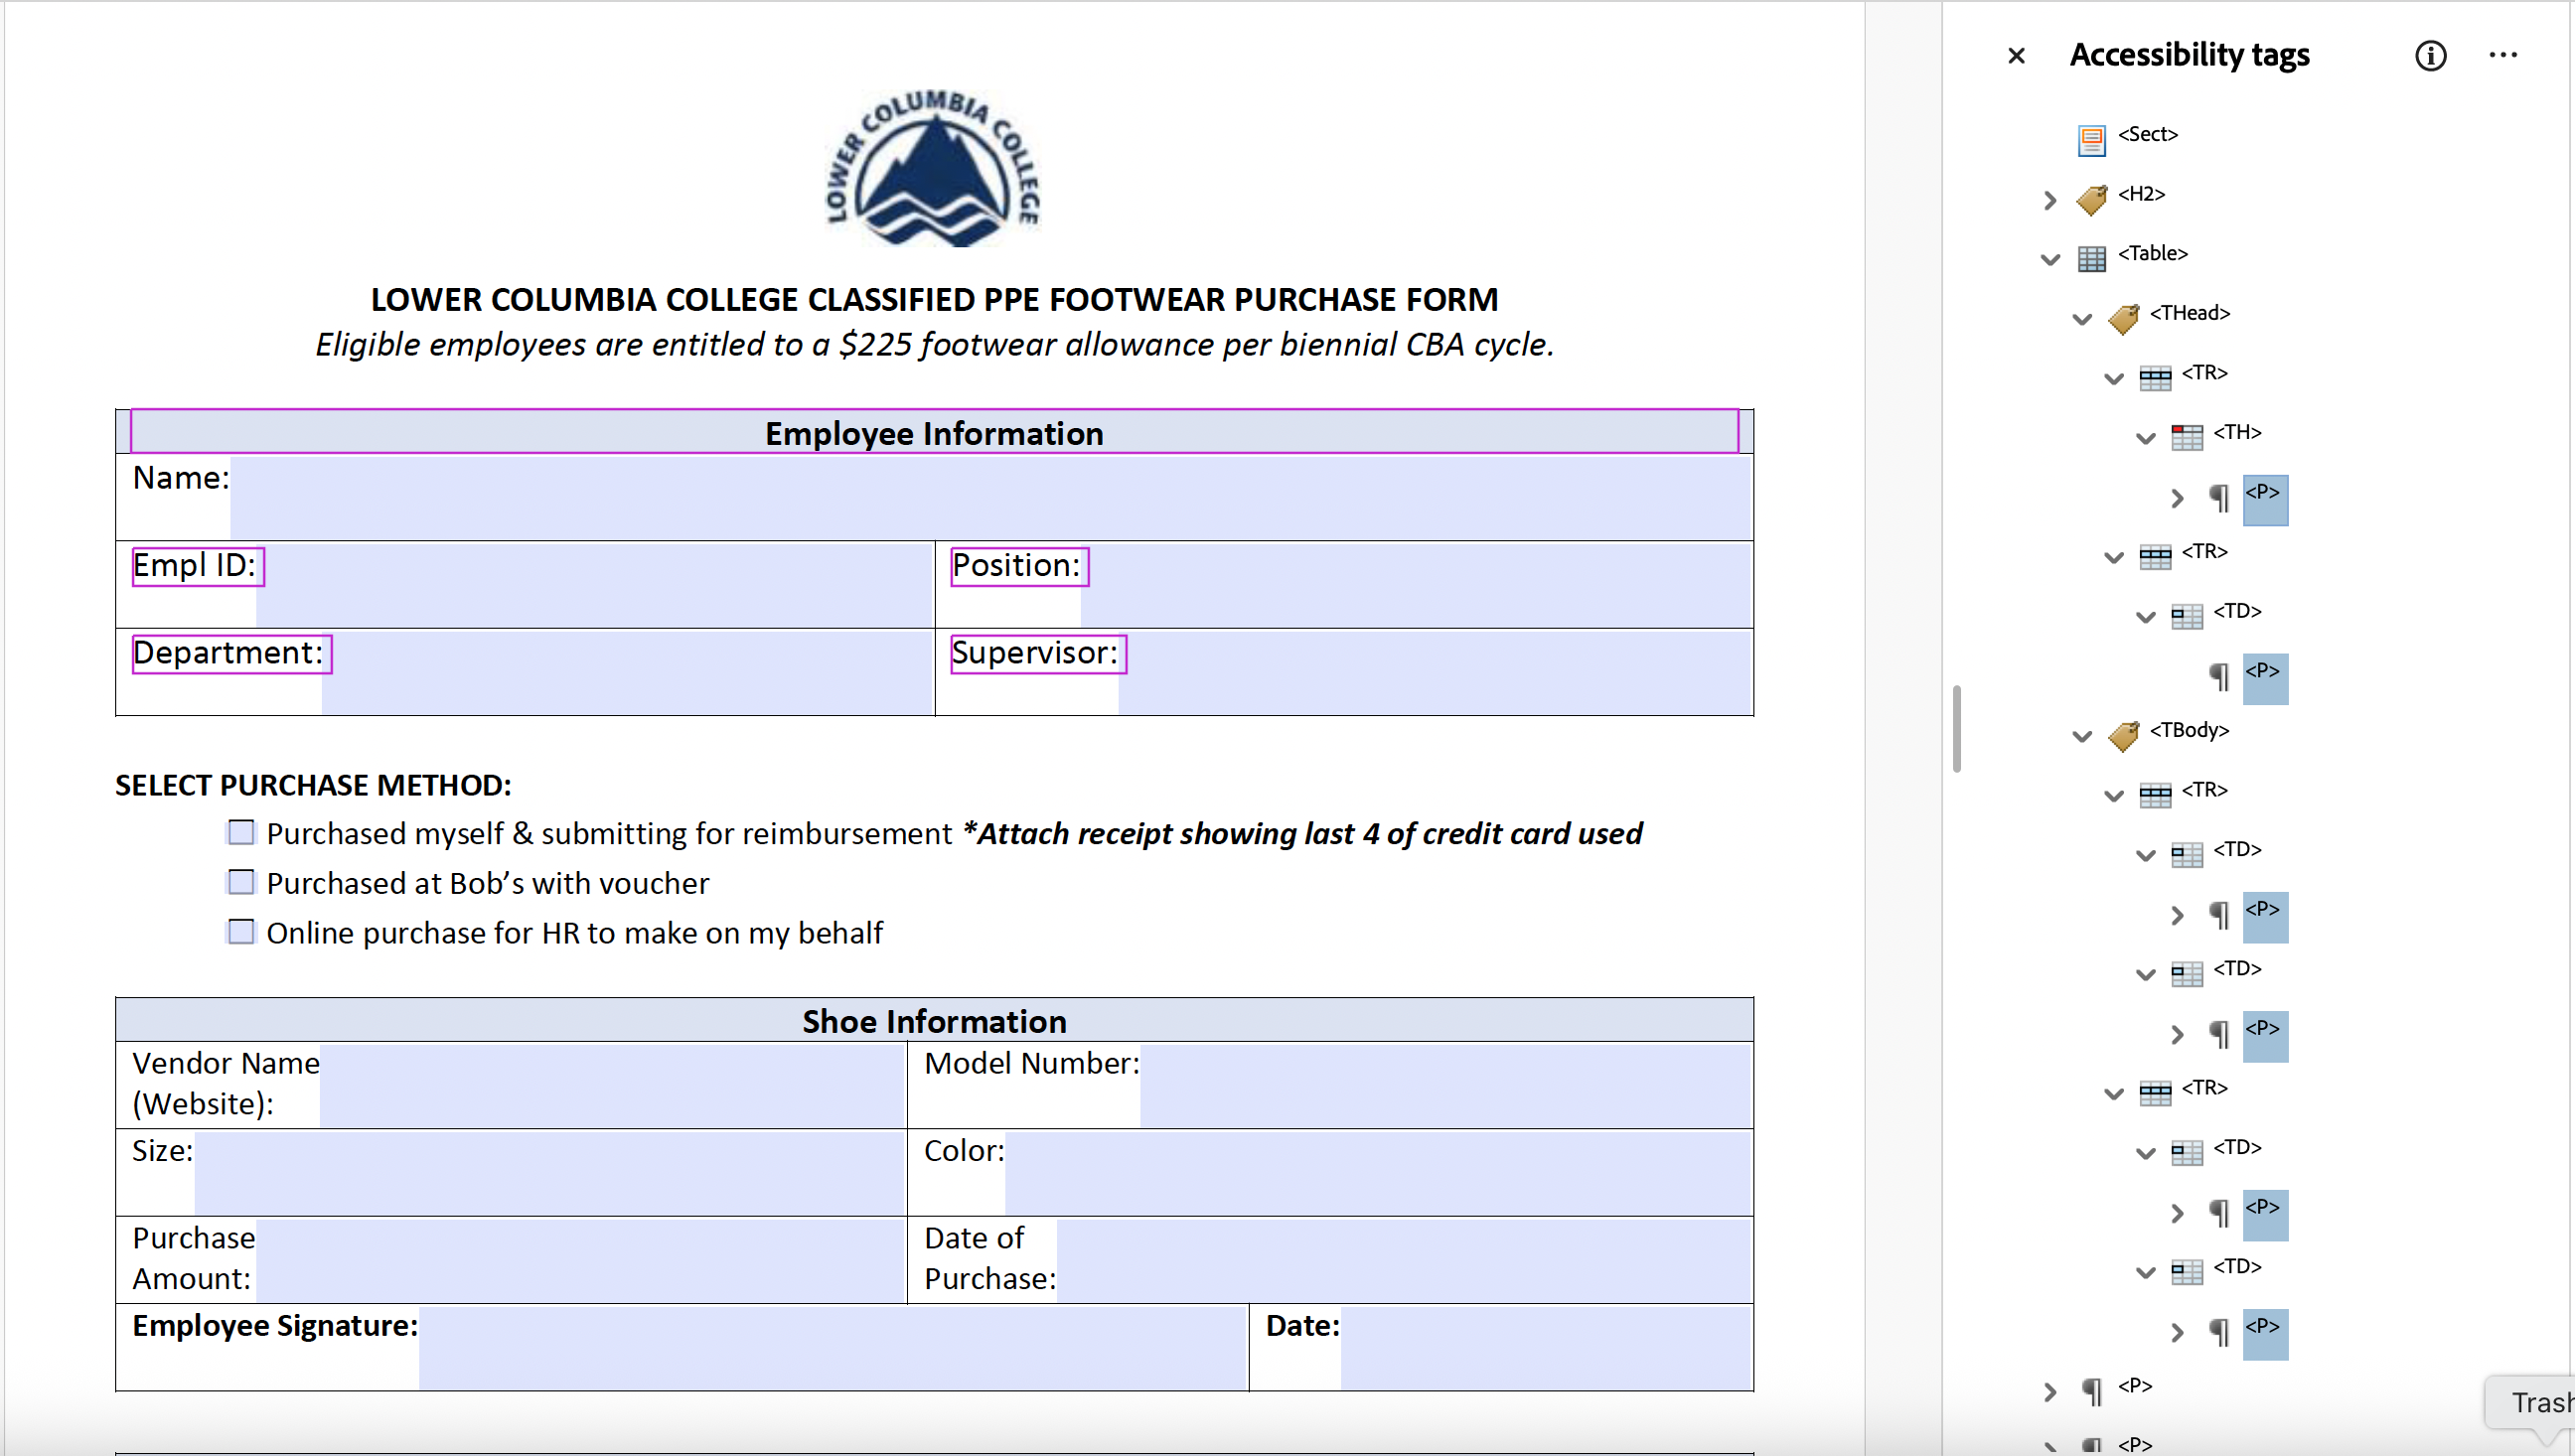
Tables used for layout
Often, document creators like you may prefer the look of using a table for their document's layout. This is fine visually, but since tables are semantic elements, this practice can be confusing for people that use screen readers to perceive your document. You don't need to change anything visually, but the tag tree should be updated to remove the table tag.
In the image below, I've selected all paragraphs <P> nested in a table tag <Table>.
 To fix Tables used for layout,
- Identify any tables in the document that are not used for data, and find their tags in the Accessibility tags sidebar.
- Open the <Table> tag, the <THead> and <TBody> within (if present), all table rows <TR> within those, and each table header cell <TH> and table data cell <TD> within each row to show the contents of the table.
 If the contents of this table are bare text tags, you will need to create new paragraph
tags <P> to contain them (or convert the <TH> or <TD> containers to <P> tags). All
bare text tags require container tags.
If the contents of this table are bare text tags, you will need to create new paragraph
tags <P> to contain them (or convert the <TH> or <TD> containers to <P> tags). All
bare text tags require container tags. - Select all the contents of the table (Hold CTRL +click). This can be done a few at
a time if that's easier. Make sure to select all the table's contents, it will be
deleted later.
Note: Some contents may not be within <TH> and <TD> tags. I have seen <P> tags at the <TR> level at times, select those too. - Drag all selected tags above the table tag <Table> in the tag tree.
- Delete the empty table tag <Table>. All contained <THead>, <TBody>, <TR>, <TH>, and <TD> tags will be deleted as well.
Your tag tree should now be more accessible.
Still Have Questions?
Accessibility is constantly evolving to keep up with emerging technologies, and the information herein is not comprehensive. If you still have questions, please fill out our form. We recommend completing the Canvas training "Accessibility Training: How to Create Content that Works for Everyone" first!