Login to LCC's Jotform Workspace to start creating your own webforms!
Login Help
If you are new to LCC's Jotform Workspace, you probably don't have a license. Open an IT ticket to request a license to get started building forms.
When logging in to LCC's Jotform Workspace, make sure to:
- Login to LCC's Jotform Workspace. LCC's Jotform Workspace is not the same as jotform.com, only LCC's Workspace should be used for LCC forms.
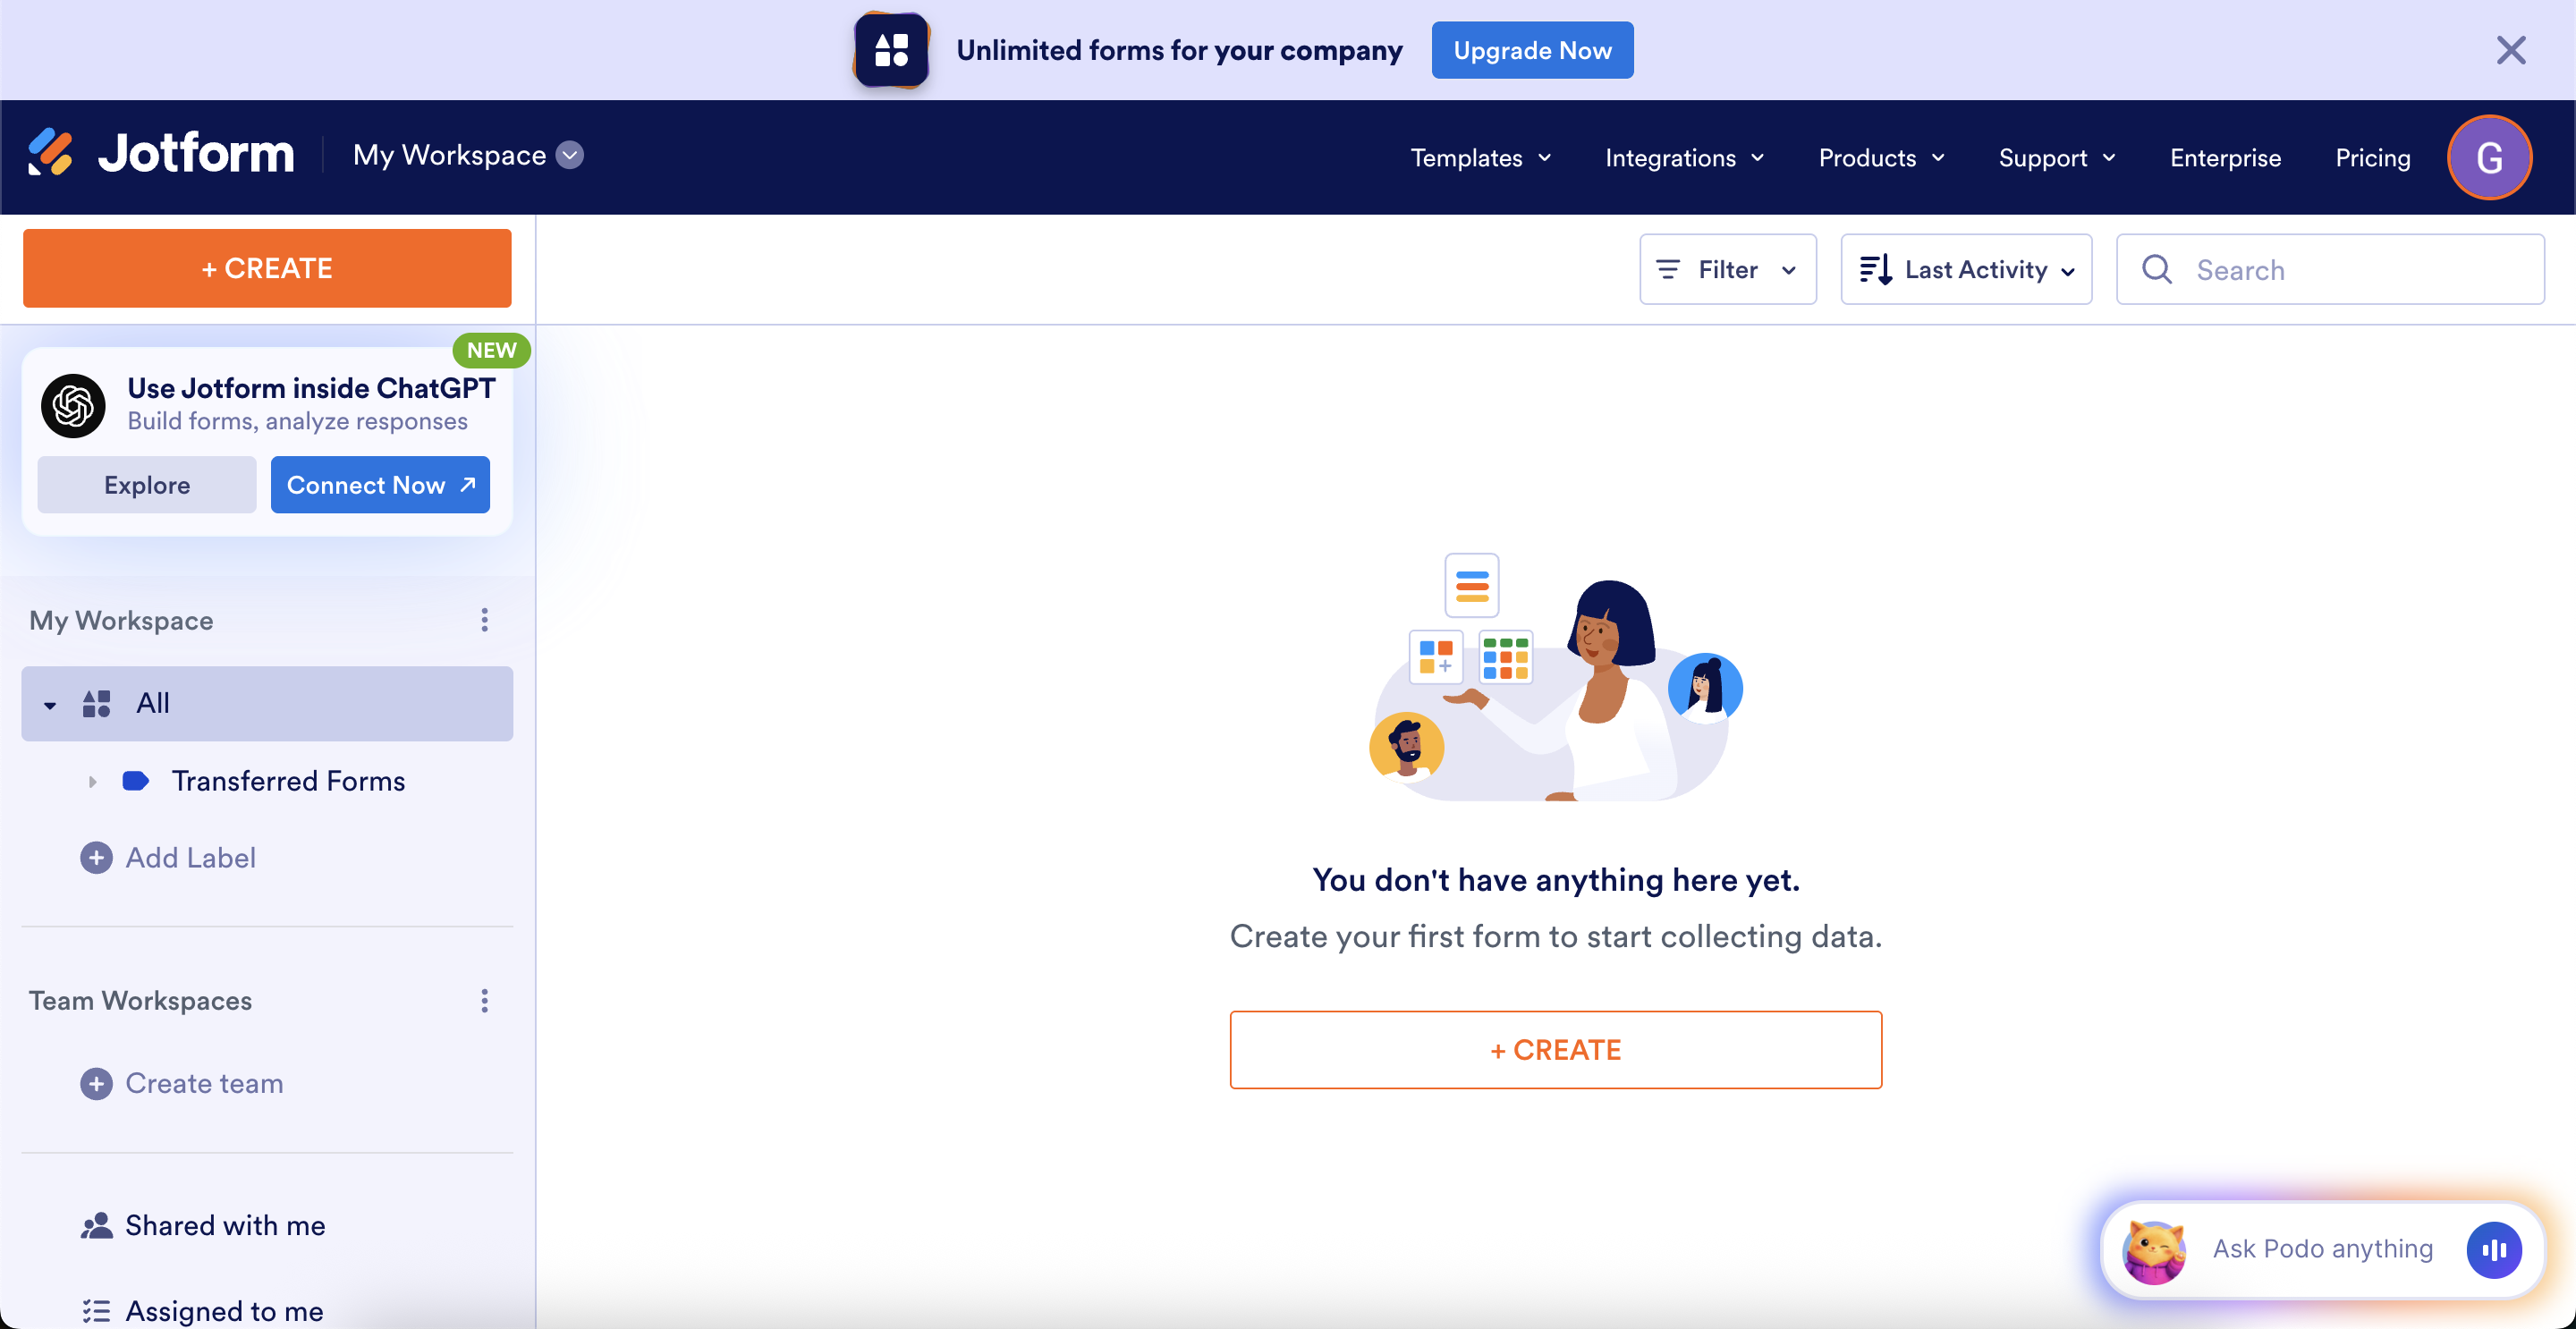
This is what the jotform.com workspace looks like (notice the lack of LCC branding). If you see this screen, you are at the wrong URL. Go to LCC's Jotform Workspace instead. - Login with Google Workspace. On the login screen, make sure to choose the "Login with Google Workspace" button,
logging in with your email will not make use of your license, and will not allow you
access to LCC's Jotform teams.
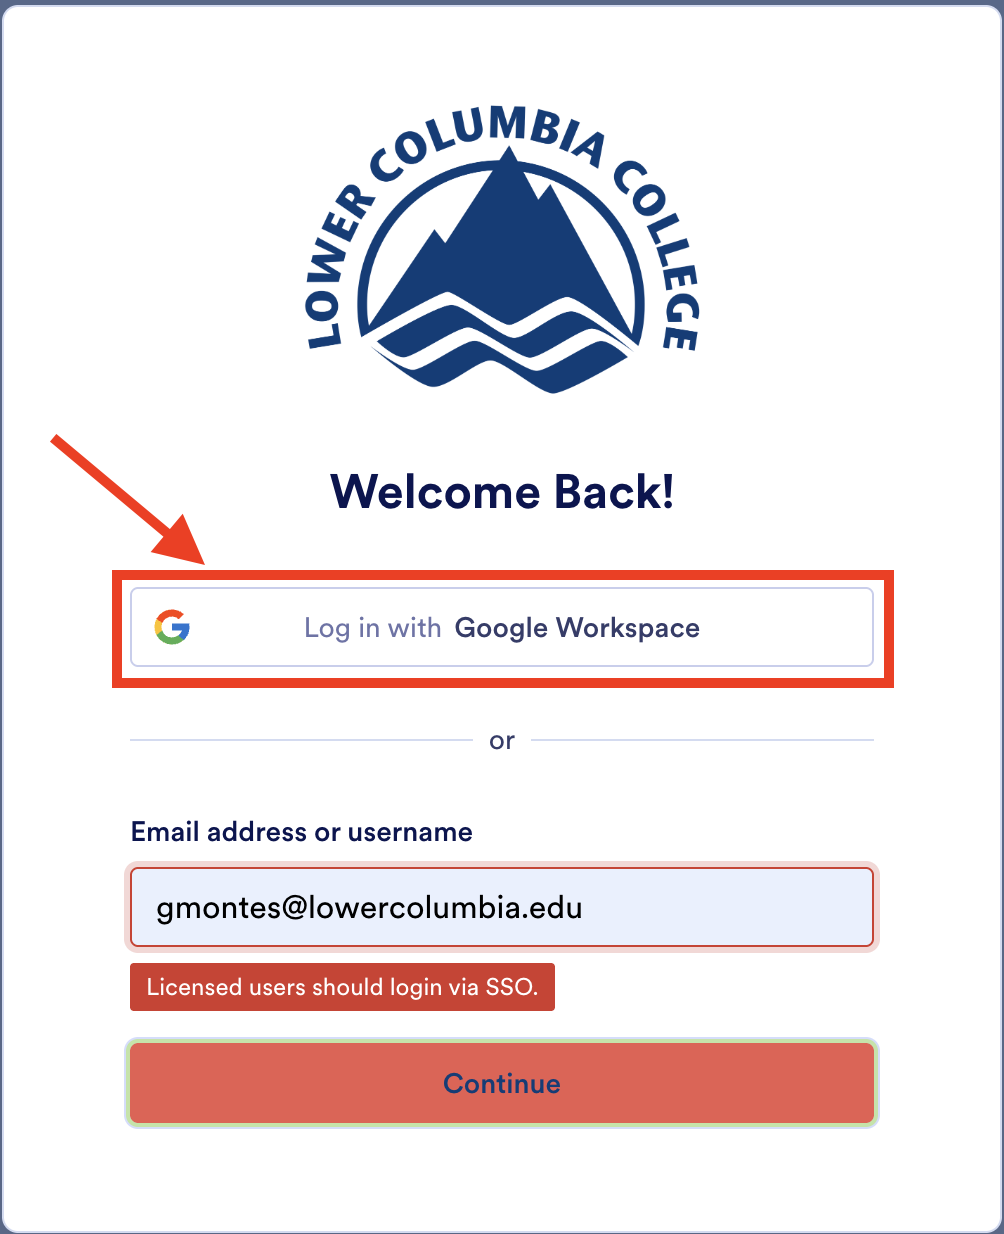 Choose the "Login with Google Workspace" option when loggin into LCC's Jotform Workspace.
 - Ensure your license is active. If your Workspace is empty and you are not a part of any teams, your license is
probably not active. Open an IT ticket to request a license to get started building forms.
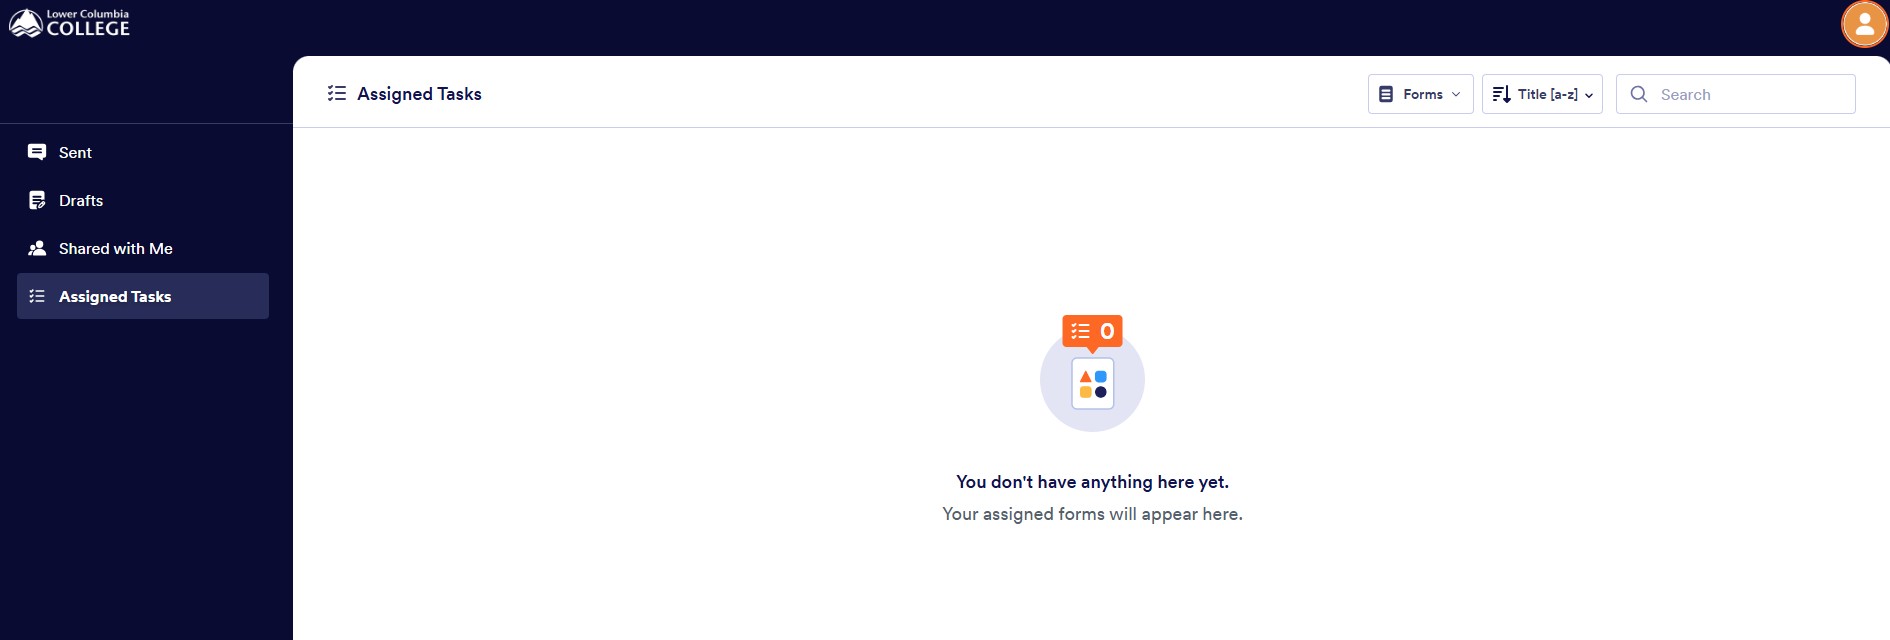
This is how the LCC Jotform Workspace will look if your license is not activated yet (Notice the lack of available Workspaces/Teams available in the top left corner).
Start Learning
Jotform Foundations

Introduction to Jotform
Get started with Jotform, learn about best use-cases, and the extent of our LCC
Enterprise License.

Introduction to Form Building
Learn how to create your first form and make the most of it with Jotform's powerful
form features.

Introduction to Data Management
Become proficient in form data management with this course.
Accessibility Warnings and Workarounds
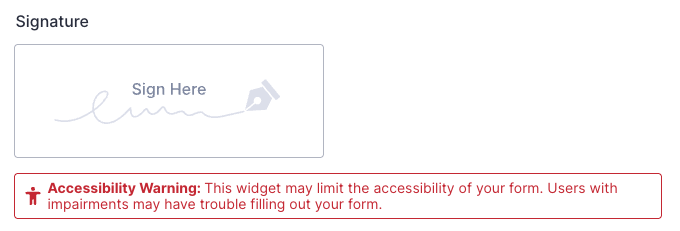
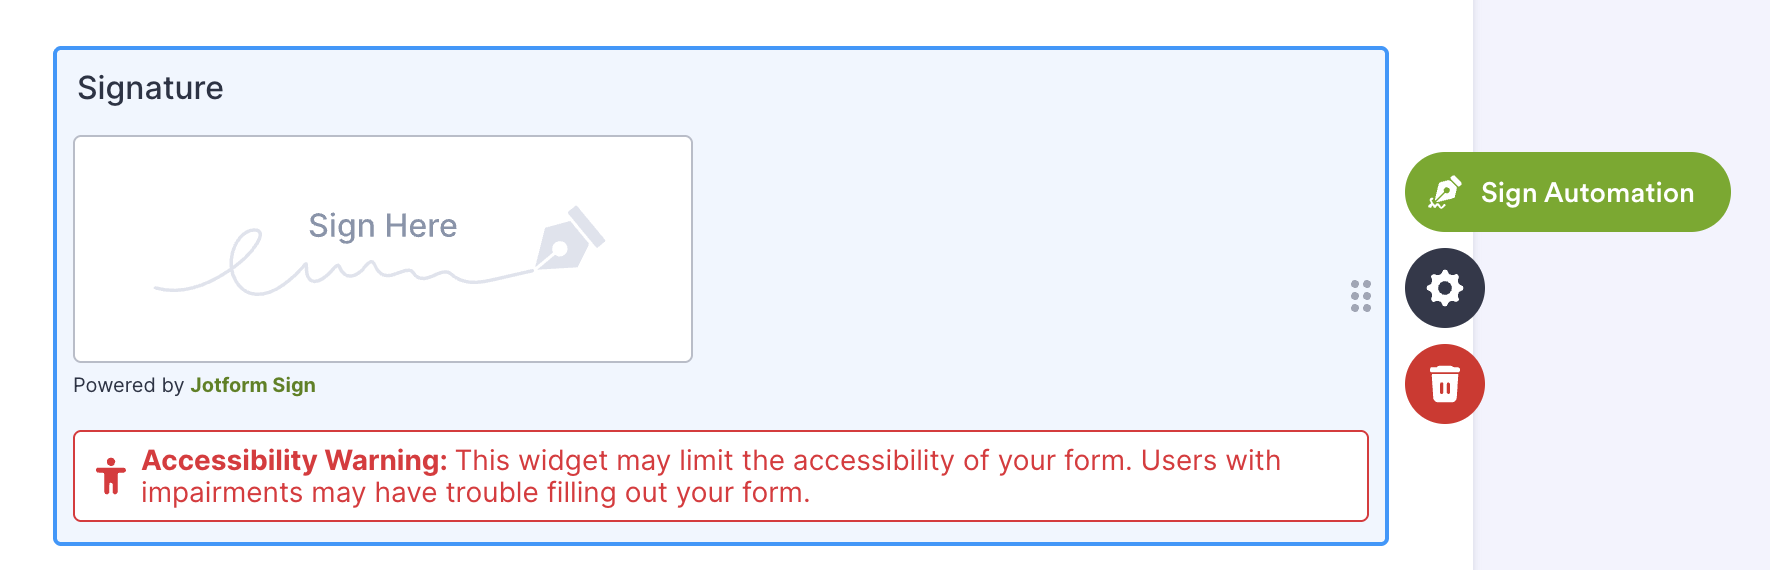
The standard signature field in Jotform is not accessible, as shown by the Accessibility Warning it carries, however, we have a workaround (below) to be able to use this element in a way that is accessible to all users.
Difficulty Level: Advanced
To ensure the accessibility of a signature element for use with Jotform Sign:
- Open Jotform Sign settings on the signature element by selecting the element and clicking
the "Sign Automation" button.
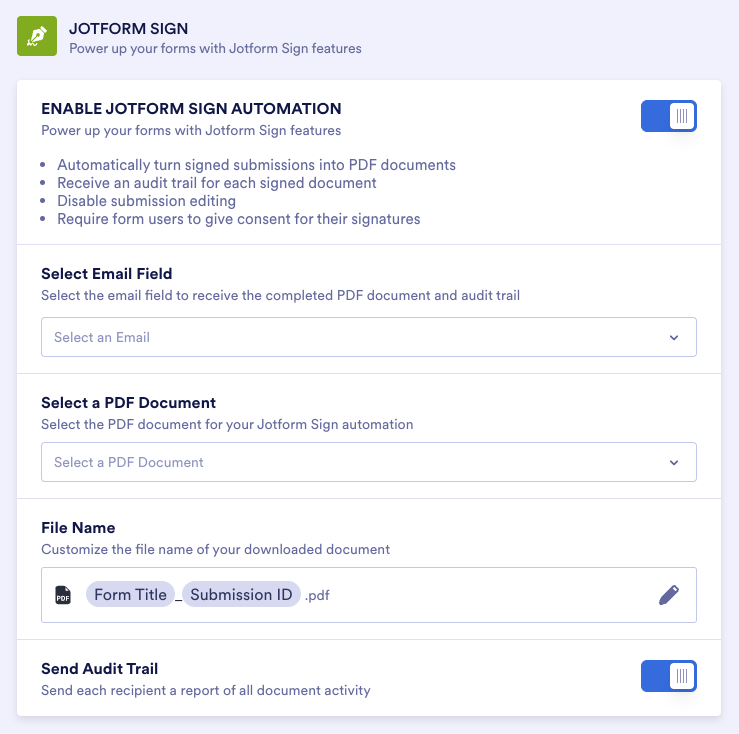
- Toggle the switches for the "Enable Jotform Sign Automation" and "Send Audit Trail"
settings on.
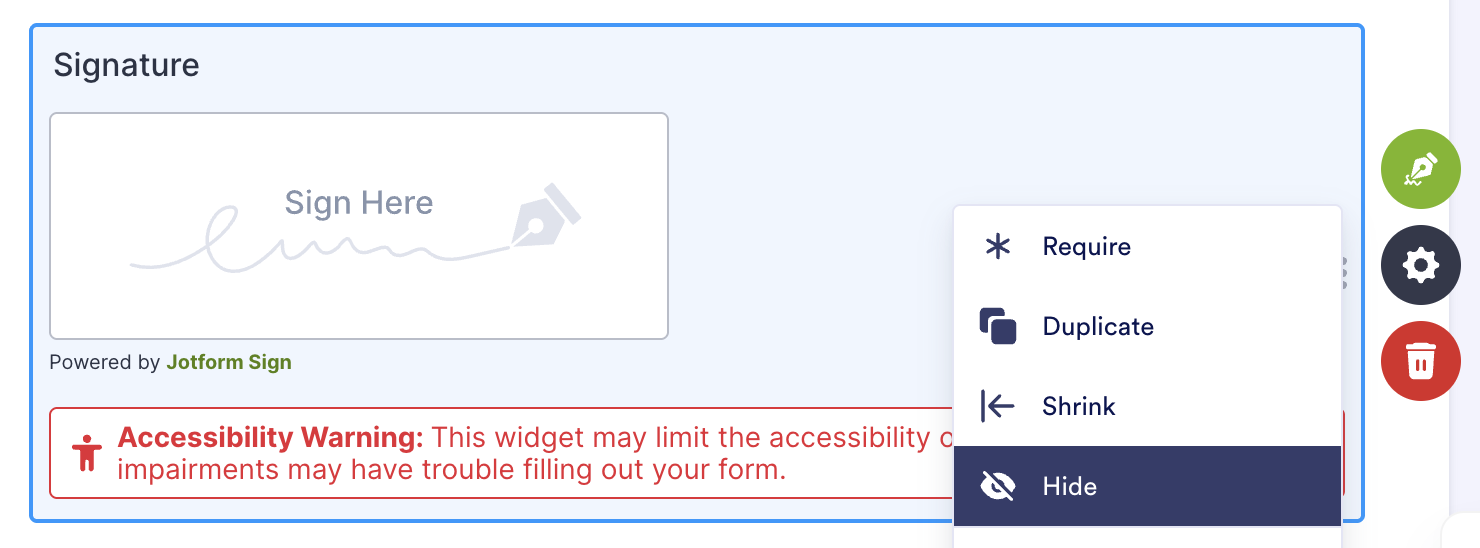
- Return to the form builder and hide the signature element.
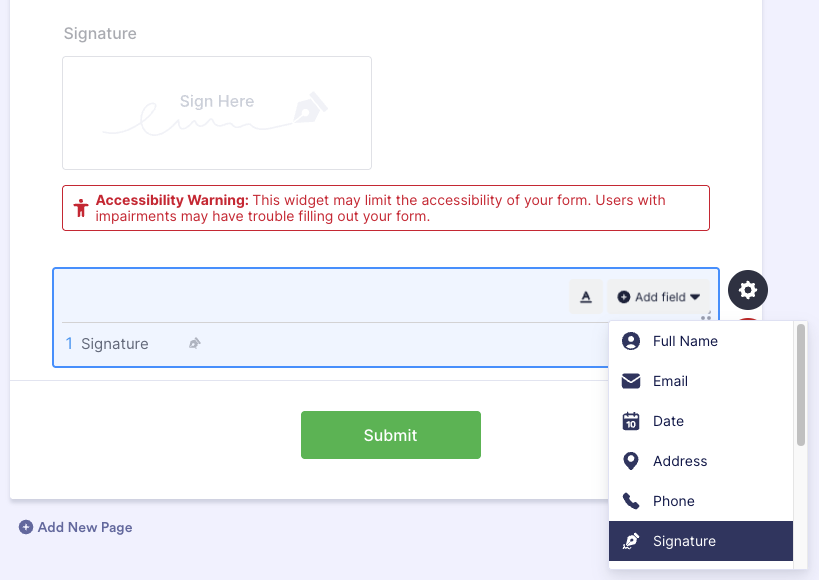
- Create a new "Fill in the Blank" element, and add a "Signature" field to it.
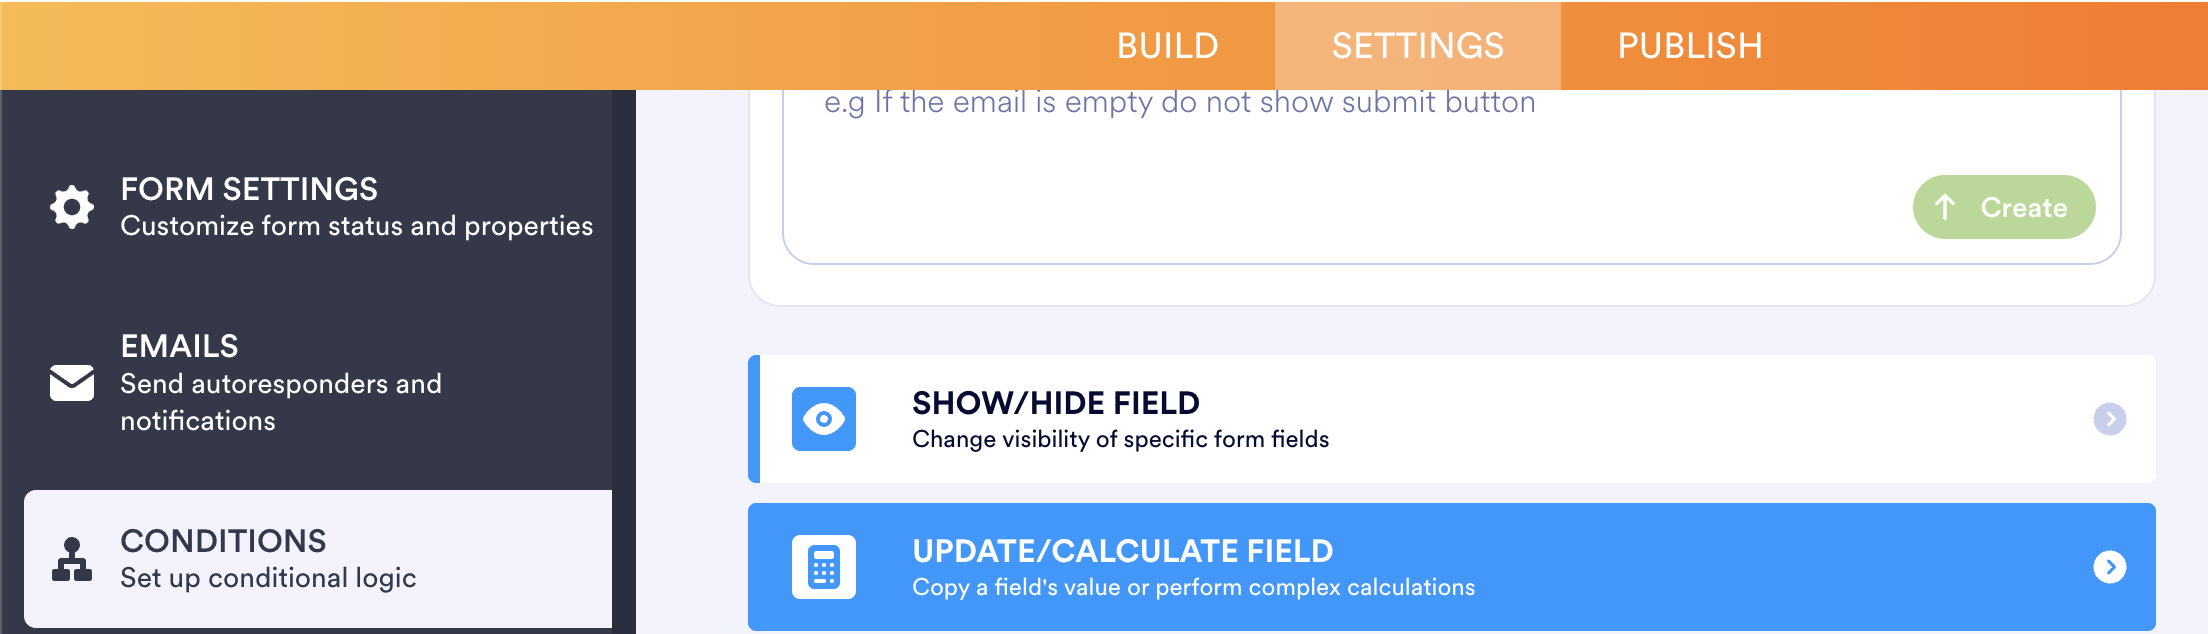
- In Settings > Conditions, create a new condition of type "Update/Calculate Field".
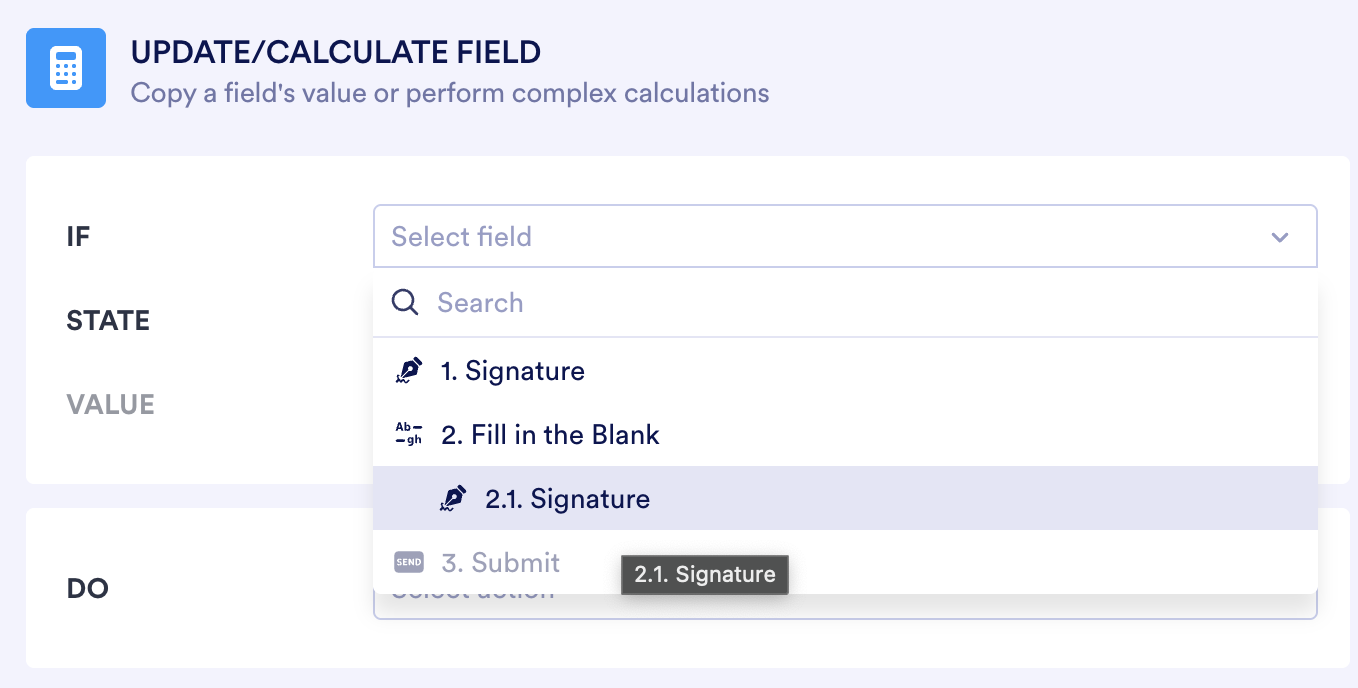
- In the condition editor, set the "If" dropdown to the Fill in the Blank signature field. (Importantly, do not select the hidden signature field, select the Fill in the Blank
signature subfield, which is indented.)
- Finish setting the condition by setting:
"State" to "Is Filled,
"Do" to "Copy Field Value",
"From" to the Fill in the Blank signature field (the indented one, its prefix should be a number with a decimal),
"To" to the hidden signature field.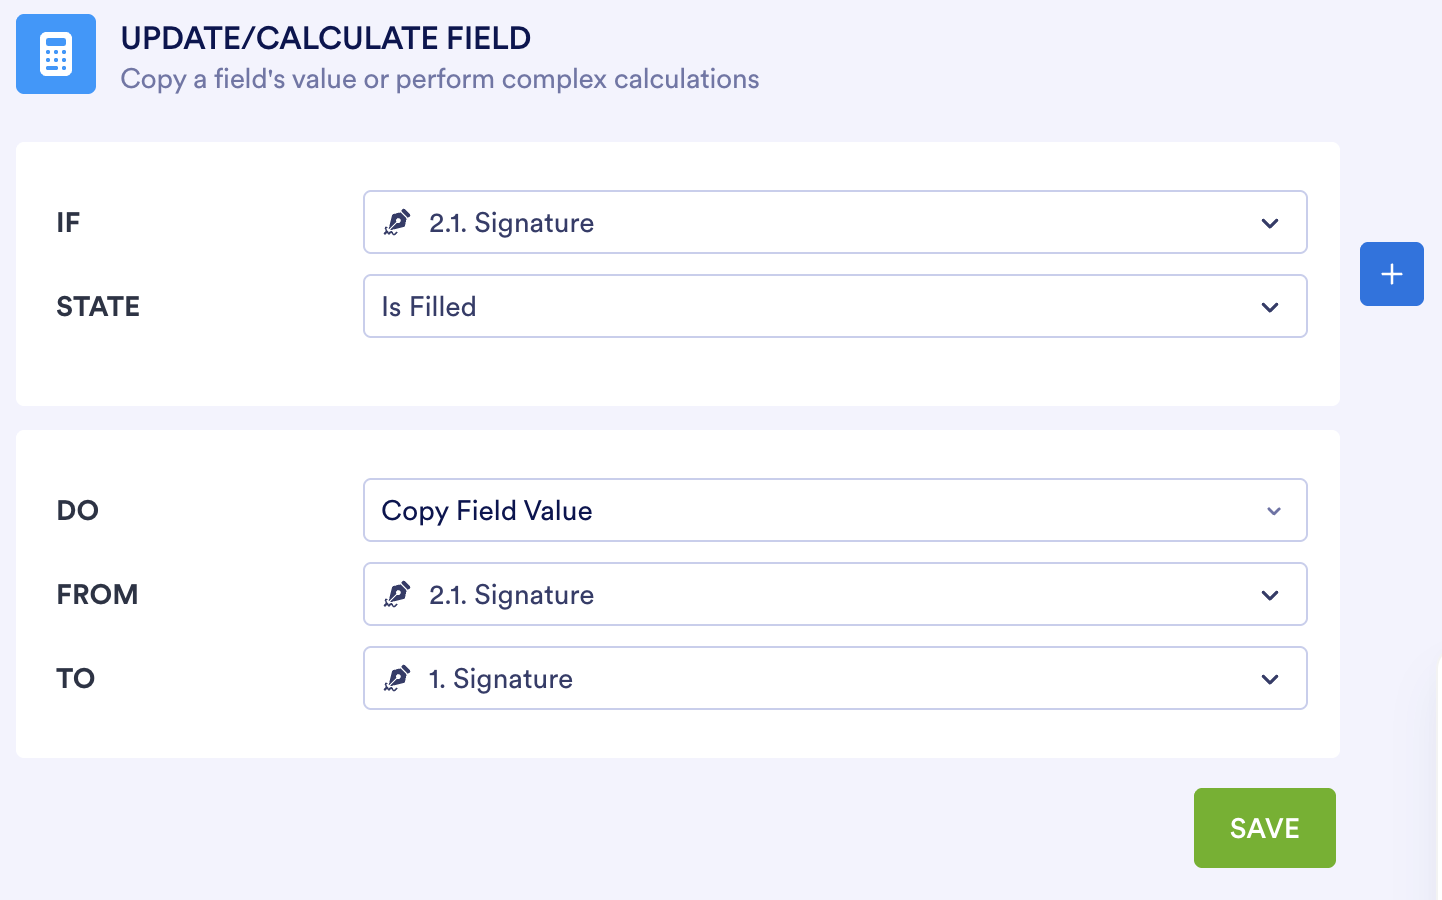
Why this works:
The Fill in the Blank Signature field is accessible, but is not compatible with Jotform Sign Automation. The regular Signature field is not accessible but is compatible with Jotform Sign Automation.
We show the accessible element, and copy its contents (when filled) to the hidden the inaccessible element, which means the signature is captured in a way that is compatible with the Sign Automation, AND the signature can be input accessibly by your users.
Signature Element (inaccessible)
- Cannot be focused with the keyboard
- Requires dextrous mouse usage to aim and generate signature.
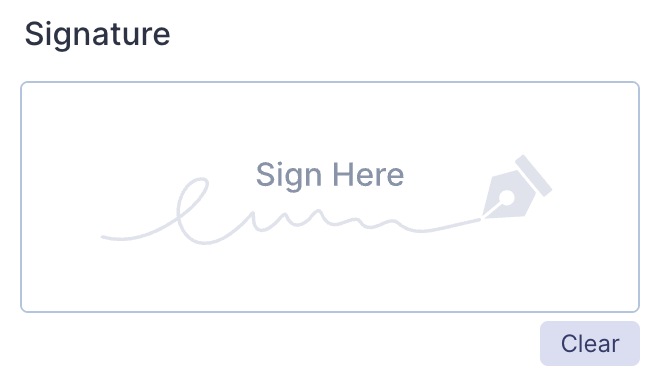
Fill in the Blank Signature sub-element (accessible)
- Can be focused with the keyboard
- Allows typing your signature with a keyboard instead of requiring use of a mouse.
- Includes the same mouse functionality for users that prefer it.

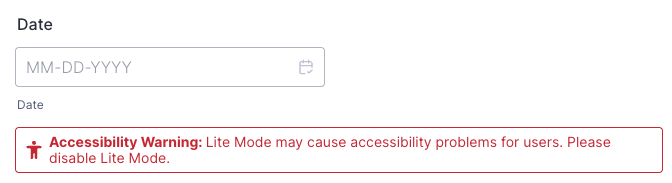
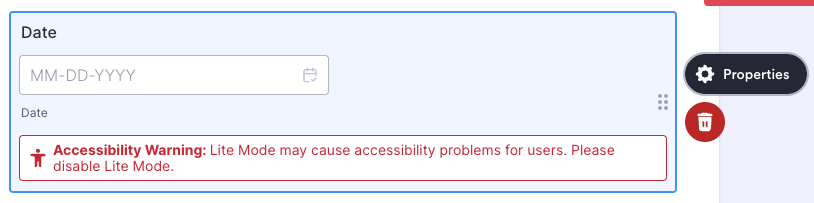
The standard settings for the date picker field in Jotform makes the element inaccessible, as shown by the Accessibility Warning it carries (don't ask me why they don't default to the accessible version). Luckily, it's an easy fix.
Difficulty Level: Easy
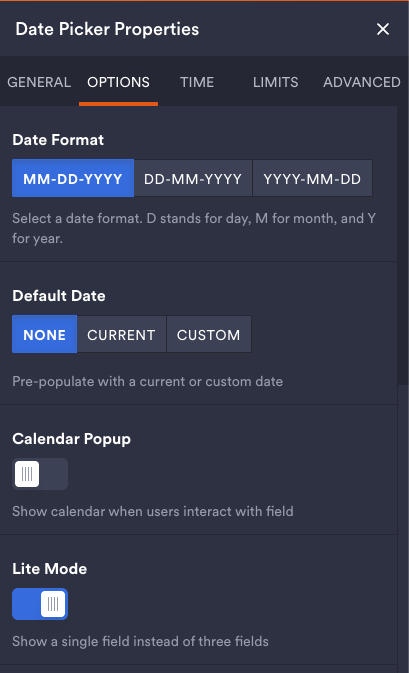
To ensure the accessibility of a date picker element:
- Select the element and open its Properties.
- In the Options tab of the element properties, disable the "Lite Mode" switch at the
bottom.
Why this works
Lite Mode sets the date's month, day, and year as all one field, and the delimiters can cause confusion because they are automatically filled in. Disabling this settings breaks the element into 3 separate fields, eliminating the usability issue.

Sometimes you want to limit an email field's options to a certain set of email addresses. Unfortunately, a "Dropdown" element cannot be treated as an email field for the purposes of Approvals and such in a Jotform Workflow. But we can fix that.
Difficulty Level: Medium
To create a email dropdown field that is usable in Jotform Workflows:
- Create a dropdown field and add options. You can even set the options to be people's
names instead of their emails.
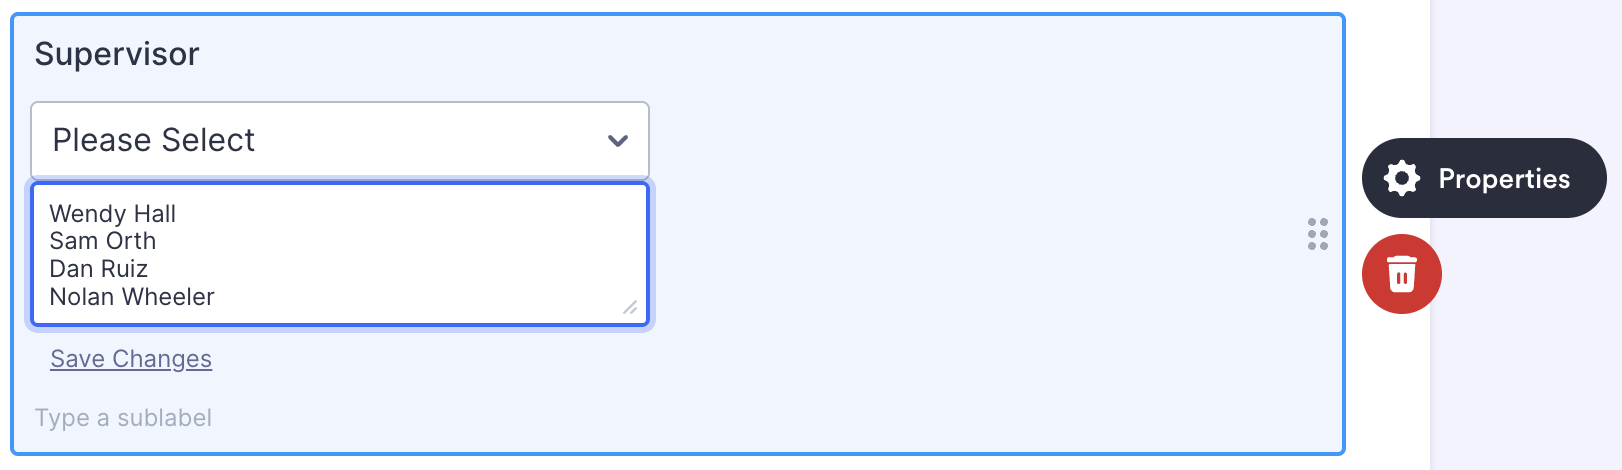
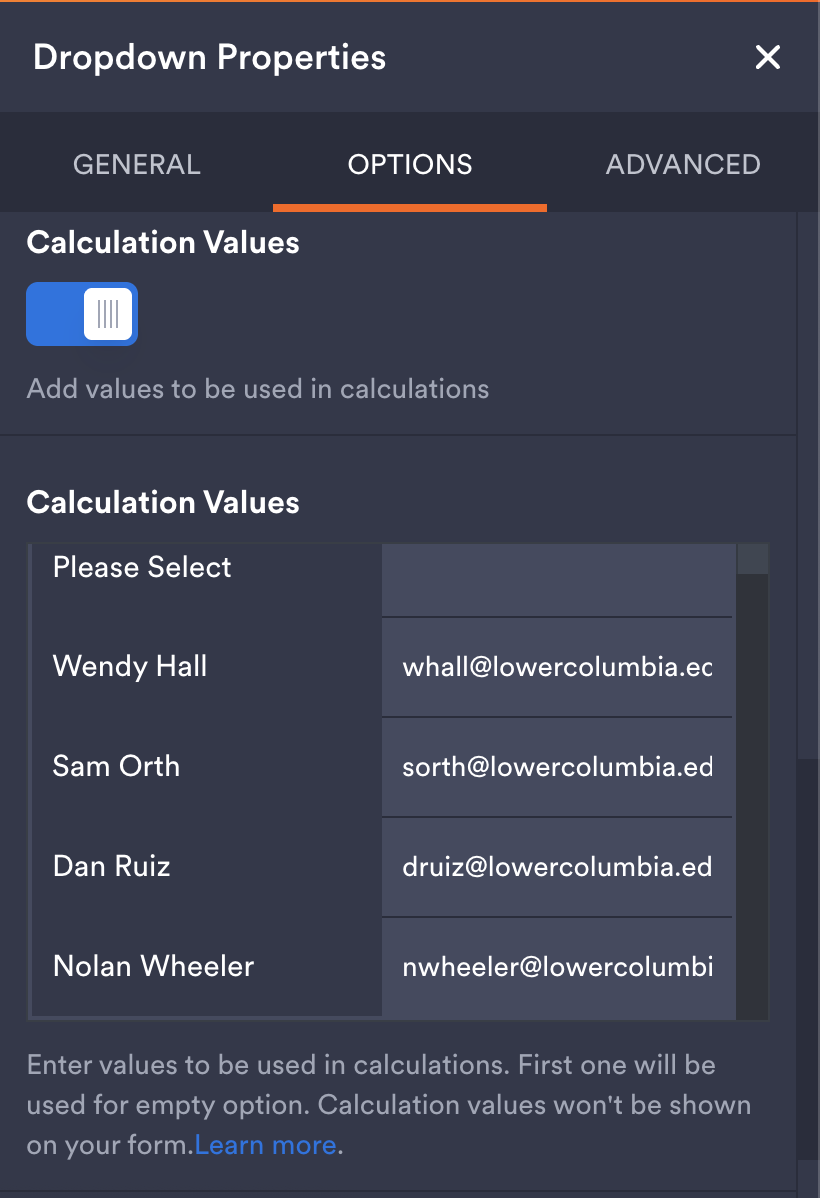
- In Dropdown Properties > Options, toggle the "Calculation Values" option on, and add
the emails for each of the name options you added to the dropdown in Step 1.
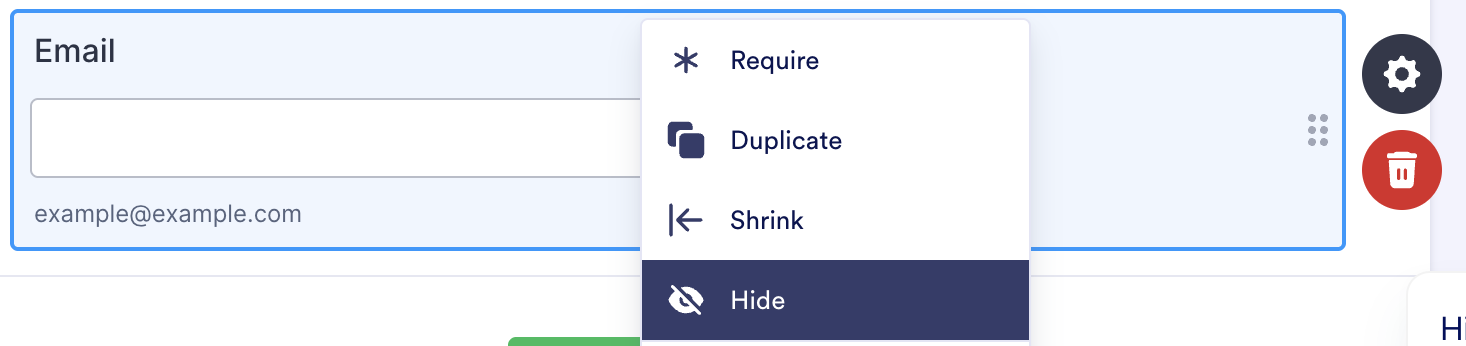
- Create an email field and hide it.
- In Settings > Conditions, create a new condition of type "Update/Calculate Field".
- In the condition editor, set:
"If" to the dropdown element
"State" to "Is Filled"
"Do" to "Copy Field Value"
"From" to the dropdown element
"To" to the hidden Email element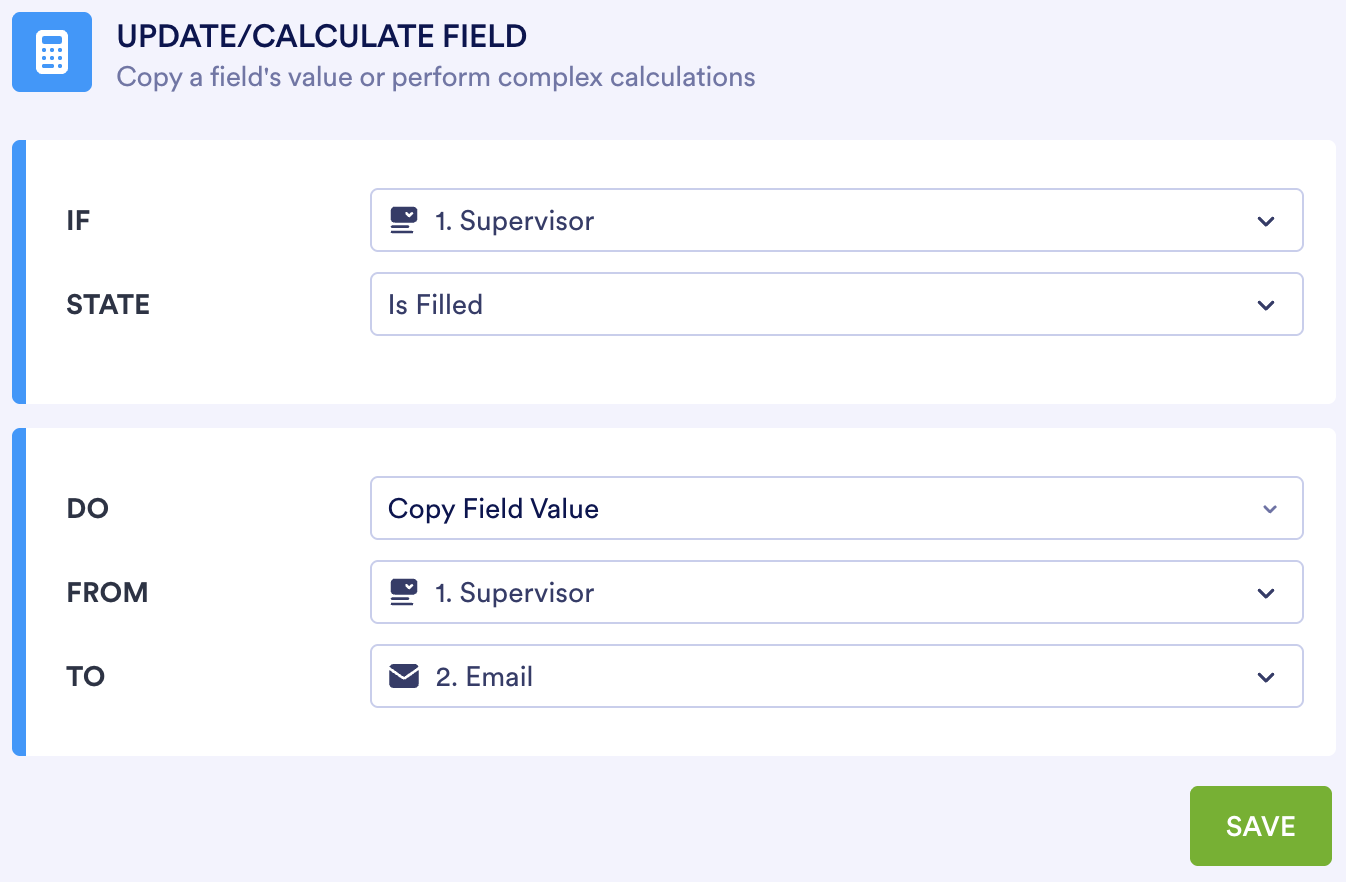
Why this works
Using a dropdown effectively limits the email addresses that are allowed to be selected. Copying the value of the dropdown selection into a hidden email field allows use of that email in Workflows for things like emailing approval requests, without allowing alternate email addresses to be input.